


Blogalong with Effy!
I’ve not been blogging very regularly of late, so when I got effy’s newsletter today and saw that she was hosting a blogalong during August, I thought it would be a good idea to sign up in an attempt to complete thirty posts in thirty days!
Meanwhile, I’ve been back to playing catch up with the Life Book 2013 lessons. I started with Danita’s great class entitled Key to Freedom. The class started with a link to this cool podcast from Tarah Brach
The theme of the lesson corresponded exactly with the July Rumi Project quote over at the Glitterhood, so I had to incorporate it!
“Why do you stay in prison,when the door is so wide open?”

I started out by drawing the girl and the cage in pencil, then painted them using masking fluid before journalling on the background using a white gellyroll pen. I then painted over everything using Twinkling H2O’s. When everything was dry, I peeled off the masking fluid, coloured the girl using neocolour crayons and painted the cage with Twinkling H2O’s. Lastly I wrote the Rumi quote using a white Uni Paint Marker.
This week’s class was from Dina Wakley.
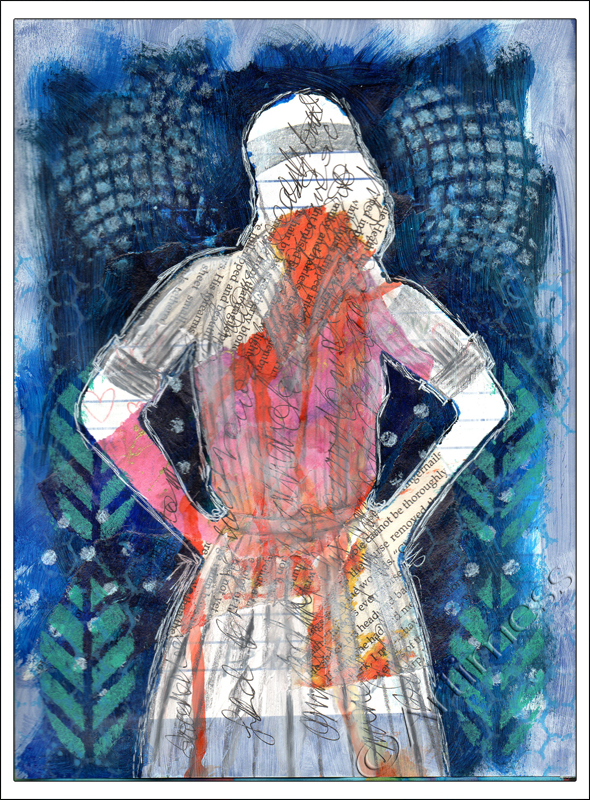
I started the page with a coat of white gesso then added some collaged book pages and old scanned artwork. Next I dripped some ink down the centre of the page and journalled across it, then placed a silhouette mask I created over the top and used acrylic paint to cover most of the page around the mask. I used stencils to add some interest to the background, and lastly, added some detail to the silhouette using a Stabilo All pencil and white acrylic paint. I found creating this page very therapeutic – thank you Dina.
![]()
Collage Lady
As you may have noticed, I’ve got very behind with my Life Book 2013 classes. So I thought this week was time to rectify the situation and try to catch up a little! Rather than go back to where I got stuck, I thought I’d start with this weeks lesson from Joann Loftus and then move backwards in time!

I created the background using 3 layers of journaling, white gesso, an acrylic paint wash and a variety of stencils. Joann gave us the template for the lady silhouette which I covered in a collage of torn magazine images and stuck to the background using sticky pads. I added die-cut butterflies coloured using Twinkling H2O’s and a silver marker pen and added highlights and shadows using white paint pens and Pitt Artist pens. I really enjoyed the lesson and love how my lady turned out!
![]()
Hand Made Art Journal
Phew! – I finally finished my latest project, a hand made art journal!


I started out by following Joanne Sharpe’s class in 21 Secrets 2013. As usual, I didn’t quite follow the instructions! Joanne taught us six embroidery stitches to use on our panels – I used three of them plus two of my own. Our design was supposed to be all embroidery, but I got rather carried away with using Twinkling H2O’s to colour my shapes! While I was busy painting and embroidering my panel, I got a newsletter from Effy Wild which gave me a link to her free Bookbinding course. Well, I had to watch it didn’t I! As a result, the journal I made is a combination of Joanne’s and Effy’s classes with a few of my own little quirks thrown in for good measure.

I drew the design for my book panel on some scrap paper then traced it onto calico using a homemade light box (a desk light pointed up through my glass topped coffee table) and a Pitt Artist Pen. I coloured it using a mixture of Twinkling H2O’s over clear gesso and embroidery stitches.

After I chose the fabric for my book cover I sat and hand tacked my wadding sandwich together so that it didn’t move about too much when I machine stitched it. I don’t know anything about quilting, but the wadding I bought was really thick, so the only way to make it manageable was to ‘quilt’ it! – I’m sure it’s not the right way to quilt, but I think it turned out alright.

Next came the pages for the journal. I started off with five signatures of watercolour paper but decided that wasn’t enough. So I added another six signatures of assorted handmade paper in a variety of sizes. I now had a small problem. Neither of the binding methods suggested would work with my enormous pile of signatures. To make matters even worse I decided to add some spacers between the signatures to allow room for expansion. My spine measured 1.5″ deep! I decided the only thing to do was to sew the signatures together in traditional binding style then somehow attach them to the cover afterwards.

I knew how I wanted the finished book to look, but had no idea how to achieve it. Once the signatures were sewn together it was easier to see what I had to do, but the technicalities of it baffled me for a while. After a lot of head scratching I decided the only way to do it would be to sew each signature into the spine individually – no mean feat with them all sewn together! But I did it, and I got the stitching to look the way I wanted it to!! Now I just have to decide what I’m going to use the journal for!
![]()
More Paper Cutting!
I just couldn’t resist doing some more paper cutting today. I drew the design, a kind of flower mandala, cut it out then thought it might look good with some colour. I scanned the cut out to print it, but couldn’t resist playing digital blending with it first…

… I rather like how this one turned out. After that little detour I got down to trying out some colours and decided to go ahead with them.


I created the mandala design on some scrap white printing paper then painted it with Twinkling H2O’s. It looked a bit anaemic on the white so I painted the background with black gesso before sticking the whole thing to black card with lo-tack double sided tape. I love the way the Twinkling H2O’s contrast with the matt black of the gesso.
![]()
Glitter Web Complete!
Finally, at long last, my sparkling glitter web is complete!


The photo really doesn’t show just how sparkly it is, so I’ve included this detail shot. Click on it to see the sparkles! I love working with Twinkling H20’s, but I’ve never actually used them as watercolour paints before – I must admit I struggled a bit with that! But overall I’m quite pleased with the result.
I created the background using a mixture of Twinkling H2O’s and Inktense water colour pencils; the spiders web using bleach, a glue pen and holographic glitter. Oh, and I nearly forgot the salt – but I only used a little bit of that! It sounds so simple doesn’t it – I suppose it was, I was just terrified something would go wrong!
There’s still one more part of Dion’s class to go (this lady believes in giving value for money!) – but as I don’t have any of the ingredients at the moment – it will have to wait awhile. Thank you so much Dion, it’ been brilliant so far – I’ll come back later for the last bit!
![]()
And More Glitter!
I have never been a great one for glitter, although I have recently become quite addicted to twinkling H2O’s. So when I read the introduction to my next 21 Secrets 2013 class I was a little nervous. Glitter – and more glitter!
Entitled Sparkle-Arkle, Dion Dior’s class promised lots of light catching paint and glitter. Wow! – so many new techniques wrapped up in one class – and this is just part one!


Much glitter later (I’m still covered in it and so are my scanner and my laptop)… here is the final result. I’ve included a detail photo as the scan really doesn’t do justice to the amazing lustre of the final piece. The list of ingredients I used is long: water colour paint, tissue paper, Twinkling H2O’s, gloss gel medium, glitter, stencils, stamps, acrylic paint, matt gel medium, gold thread, gilding flakes, pva glue, glue pen, and perfect pearls. I didn’t have a lot of the suggested products so I had to improvise, but it was great fun!
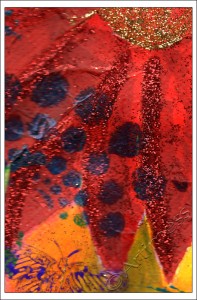
I’m not going to attempt to describe the process – you need to sign up for the course for that, I’ll just show you this sneak peek of the underpainting.
Now if you’ll excuse me, I’m off to start part two of Dion’s class. More glitter!
![]()
Playing Games
I’ve been busy altering tins and making game cards for Diana Trout’s class on the 21 Secrets 2013 course.

I took two old cough lozenge tins, sanded them and primed them with gesso, then painted them with acrylic paint. It was not a success – the paint started to flake off! So I covered the paint with tissue paper glued on with gel medium. Success! I still wasn’t happy with the way they looked, so I added several more layers of acrylic paint in different colours and another layer of gel medium. Once I was happy with the tins I created their labels using a stamped flower and a digital label. I coloured both of these using Twinkling H2O’s. I made the game cards from double-sided scrapbooking paper, then used the same stamped flower and digital label for the instructions.
I found this class to be quite a challenge, but I’m glad I did it – I learned a lot. Thank you Diana.
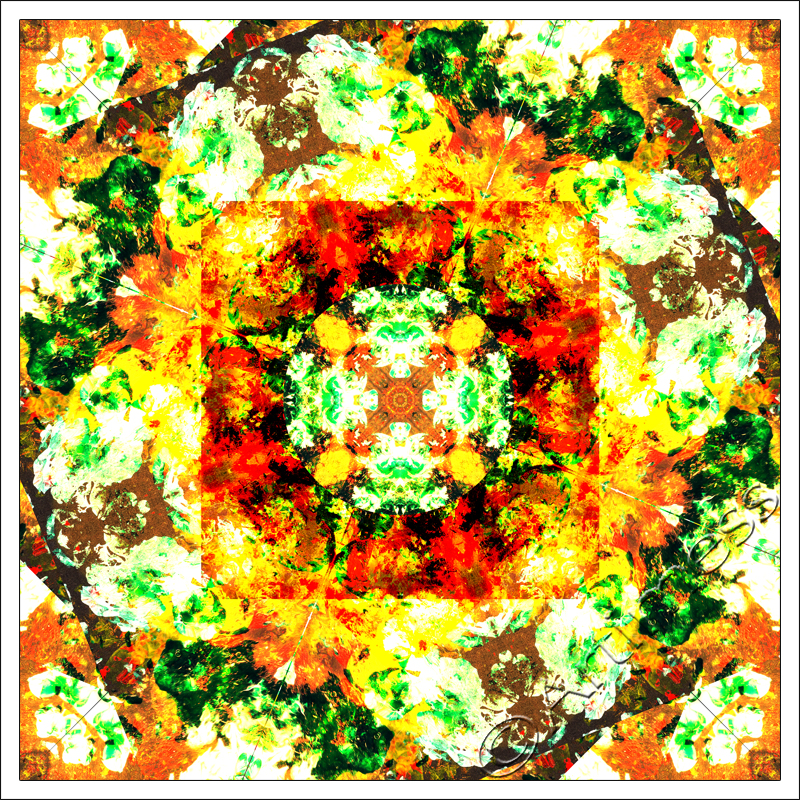
About a week ago I posted this blended image and said I didn’t think I was quite finished with it yet. This is why – I just turned it into a kaleidoscope! I love the colours and all the faces in the patterns. How many faces can you find? I keep losing count!
![]()
Quirky Bird Bug!
Yes, I have definitely got the Quirky Bird Bug – I can’t seem to stop drawing them!

This time I decided to try painting one on material. I primed the material using clear gesso then painted the bird using a mixture of acrylic paint and neocolour crayons exactly the same way I did on the paper. I’m really pleased with how it turned out – I love the way the pattern on the material shows through in places under the paint.
Drawing birds has kept me from finishing my latest zentangle canvas, but today I finally finished it – number five in the series!
I decided to try drawing with some Pitt artist pens as the unipin pen nibs were wearing out so quickly! The Pitt pens are lovely and very waterproof, but I think it must be drawing on the canvas – they’re wearing down too! As before, I used the luscious Twinkling H2O’s to add colour to the image.
Maybe some mixed media paint splashing will cure me of the Quirky Bird Bug – keep watching this space!
![]()
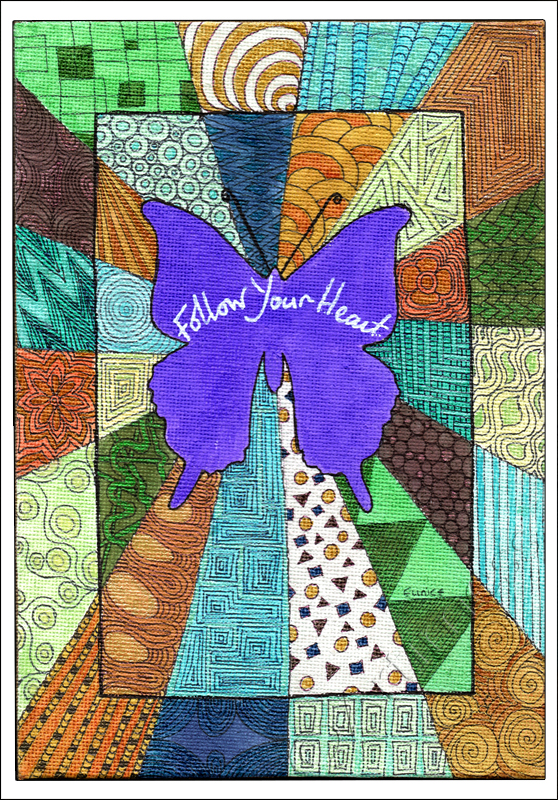
Zentangle Star
Today I finally got around to finishing my latest zentangle canvas! I drew it at the beginning of the month but didn’t get round to colouring it till today.

This was the original, drawn on a canvas board using a unipin fine line pen…

… and this is the final version, coloured using Twinkling H2O’s.
![]()
Zentangling again!
I’ve been zentangling again! Only this time I forgot to scan before I started painting.

I chose an Ankh as my central image – said to represent eternal life, dating back to Egyptian times. As with the others, I drew it using a unipin fine line pen and coloured it using Twinkling H2O’s. I added a small gem stone to the centre which made it impossible to scan! No matter how hard I try to capture it, the image is a pale shadow of the original!
![]()