Back to Wrecking My Journal …
I got back to wrecking my journal yesterday. The instructions on this page say “This page is dedicated to internal monologue”. For someone like me who struggles with words, this was a bit of a problem … but when I really thought about it – I knew what to do!
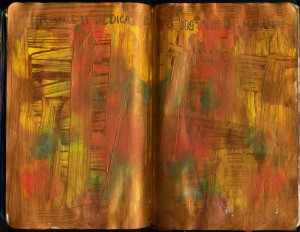
Internal Monologue
I splattered paint over the pages, squished it between the pages, then combed it with a small makeup comb! I used the colours that are currently a major influence in my life right now – red, yellow, gold and green. The scan really doesn’t do justice to the amazing sheen of the the metallic gold paint and the vibrant tones of the colours peeking through from underneath!
I started this next page a while ago, I drew the castle tower with a soft water soluble graphite stick and washed over it to smudge the lines; but when the ink from the following page (four-letter words) bled through all over my drawing, I couldn’t decide what to do and just left it half finished. Inspiration came the other day! I created a grid of lines with the graphite stick, smudged the lines with water, then filled the gaps with sharpies to give an abstract stained glass effect. I coloured in the letters on the castle page and inked over the bled through words to accentuate them.
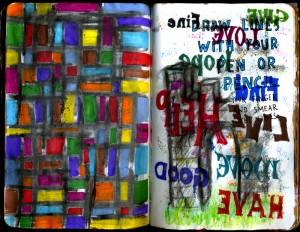
Smear the Lines
It’s one of the main things I have learnt from this journal … things don’t have to be perfect to look good … accidents often improve the artistic content of a piece of work 🙂
Let’s Have Some More Creativity!!
Yes!! … I’ve done it! I’ve linked and transferred all the posts, images and comments from my free WP blog! I couldn’t believe how simple it was 🙂 Any way … enough of my rambling …. let’s have some more creativity!!
Last week, my daughter left home to start her life at Greenwich University. I decided a ‘Welcome to Your New Home’ card was a bit too normal, so to mark the occasion, I made her a Mixed Media Collage picture for her wall.
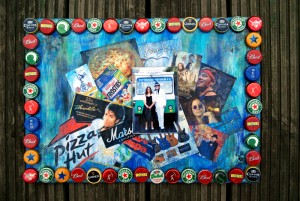
New Home Present
I started off with an old piece of mount board left over from my own days at Uni not that long ago. I painted it with white gesso to give me a good base to work on then coloured it using a three or four colours of acrylic paint and various techniques. My next step was to arrange the images into an interesting shape which I then covered with more acrylic paint to make them blend in. I mounted the central image onto some corrugated board and stuck it in the middle, then made the frame from old bottle tops.
Delivering the picture, along with a car load of ‘forgotten’ bits, at the weekend gave me the opportunity to take my camera out round the O2 on Saturday night. With my normal penchant for the unusual .. I was quite pleased with these detail shots taken inside the dome.

O2 Ceiling Support - 1

O2 Ceiling Support - 2
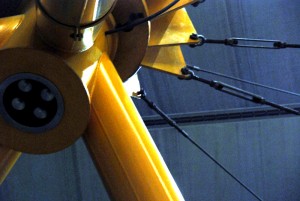
O2 Ceiling Support - 3
I love getting out with my camera – it provides me with a wealth of original images that I can turn into artwork for all kinds of uses.
Artimess Finally Hosts Own Blog!
I’ve been active on my free Wordress Blog since April this year, but have been wanting to set up and use my own domain name for some time. Today I’ve finally achieved that goal … with a lot of help from my brother Marcus 🙂 Now I just have to find out how to link the two and personalise this one to look how I want it to. I’ll be burning the midnight oil for a few nights!!
….. A Bit Early for Christmas …… !
I know it’s a bit early for Christmas …. but I’ve been making paper chains!
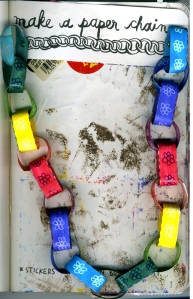
Make A Paper Chain!
Not full size ones, just one mini paper chain made from a page of my Wreck this Journal book! I coloured the strips with Sharpies, then drew flowers on them using Sakura Souffle pens. Lastly I glued them together and attached them to the journal using mini brads.
I started this doodle ages ago during a long telephone conversation with my brother. Then it got put aside and I forgot about it for a while. So when I stumbled across it the other day I thought it was about time I finished it!!

Pretend You Are Doodling ...
I used a very fine Copic Multiliner pen.
The word I chose for this next page is the Artist in me acknowledging her presence!
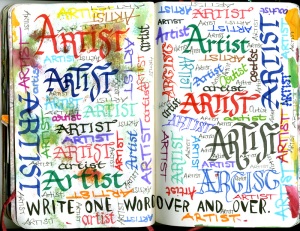
Write One Word ...
I used some cheap Calligraphy pens from Asda for the calligraphy (which as you can see – write beautifully), and a mixture of other markers for the rest of the writing.
The journal is getting soooo thick now …. I have a job to hold it and I still have loads of pages to do!!! So much fun 🙂
Jigsaw Pieces, Thick and Thin Lines, Gesso and Gel Medium
Jigsaw pieces, thick and thin lines, gesso and gel medium …
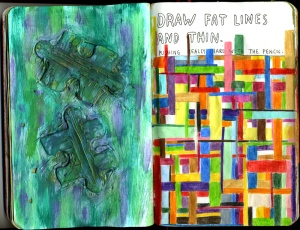
Draw Fat Lines and Thin
I had great fun drawing the thick and thin lines with my water colour pencils. I’m still considering giving it a wash to soften and blend it … but I can’t make up my mind … so I’m leaving it for now!
The jigsaw pieces weren’t meant to stick to the page!! I was trying to make a raised jigsaw outline, but I used a bit too much gesso and when I came to remove the pieces… they were stuck solid!! So I turned them into a collage instead and added some thick gel medium to create some great textured ridges in the pieces!
After I scanned the image of these pages into the computer, I created an A4 print of the coloured lines pages and printed it out.
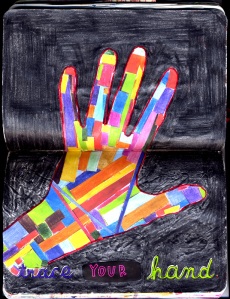
Trace Your Hand
I used this to cut up and make a sort of collage/mosaic fill for my traced hand. I coloured the background using a black water colour pencil.
I’m having so much fun with this journal and learning so many new techniques; but most importantly i am learning to be more experimental in my creativity.
Macro Camera Shoot
I took my camera out for a long overdue photo shoot the other day …. not the pretty picture kind mind you … more an up close and odd angles shoot!! This is a macro shot of one of the handles on my (rather rusty) wheelbarrow.

Wheelbarrow Handle
Then I started playing blended images …. a brick blended with a piece of angle iron ….

Genesis - In the beginning ...
… a rusty tin blended with a sycamore seed …

Rusty Seed Tin
… and late at night I managed to capture my first spiders web!

Spiders Web at Night
It took a bit of doing – I had to get my daughter to stand outside waving at the motion sensor on the security light … but I think it was worth it! I hope to get some better web pictures once we get some frosts later on!
Losing, Tearing & Four Letter Words ….
Losing, tearing and four letter words …. yes … I’ve been wrecking again! But I must confess …. I haven’t actually lost the “Lose this Page” yet …
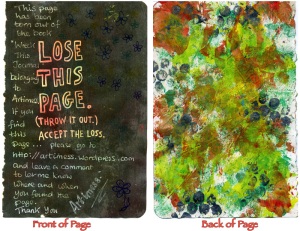
Lose This Page - writing asking for finder to contact and leave comment on blog
… I just tore it out of the book and got it ready for losing, which of course involved writing messages on it and splattering paint all over it’s other side! I may add some writing on the painted side before I lose it [maybe the secret message to hide] but only the person who finds it will know for sure!!
When I first tore the strips on this page…
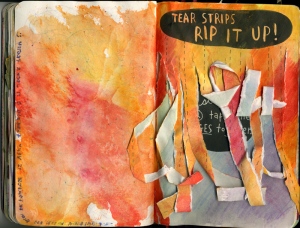
Tear Strips - Rip it up!
… they curled up and looked really pretty, but by the time I got round to scanning the page they’d got well and truly squished … much more wrecked looking!!
I thought I’d make my four letter words colourful …

A Page for Four Letter Words
… I used my nice new sharpies which look really great here … but they bled through several pages on either side … definitely journal wrecking! I’ll have to find ways to incorporate the back to front words into those pages … maybe rename the pages and call them the write backwards pages!! …. Keep watching 🙂
Make a Mess ….
‘Make a mess, clean it up’. That was the instruction on this page …

Make a Mess
… and I know it doesn’t look very much like a mess, but if you saw how I made it you would have have to agree that I followed the instructions!!
I had been working on the Kelly Rae inspired journal that I’m currently making and had various surfaces covered in leftover paint lying over my desk. I should have taken some pictures … but it was the early hours of the morning and I was more concerned with getting cleared up and into bed. But I hate just throwing things away! Then I remembered this page in the ‘wreck my journal’ and I knew what to do!! I used a very wet paintbrush to loosen all the dried paint and plonked the journal into the wet paint. I did this several time until all the paint was used up … et voila!! … one completed jounal page and nice clean surfaces … mission accomplished 🙂
The scan of this next page really doesn’t do it justice.
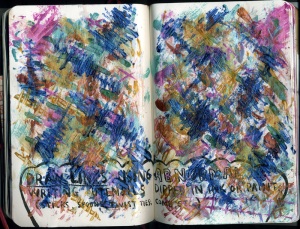
Draw Lines ....
The page instruction said to ‘Draw lines using abnormal writing utensils dipped in ink or paint’. I went for the paint option and dipped into it a paper clip, a hair grip, a make-up brush/comb, a cardboard tube, a plastic covered wire tie, a lolly stick, a bottle top, a button, and a staple remover. It looked Ok … but I wasn’t finished! I added a thick layer of glossy gel medium and used a small comb to make lots of ridges in it. Then I left it to dry. I love the way it turned out … it has a really great texture … the only problem is that the gel medium sticks to itself when the book is closed and it is quite difficult to prise the pages apart … but it make a wonderful noise when you’re doing it!!
Burning, Making Coffee and Licking the Page!
Yes! …. I finally got around to the burning page in my journal.
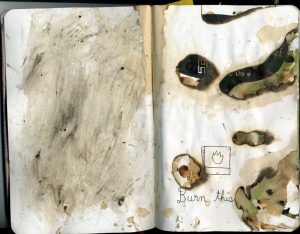
Burn This Page!
It was quite scary how fast the page burned … I had to use the coffee I’d made for the next page to douse the flames!

Fling Your Coffee!
As I don’t drink coffee, I thought I’d add my own twist to this page … I made the coffee and spilt it over the page (and the rest of the book – it really is a multi sensory book now!!) then shook some coffee graunles onto the page and gave them a good stir with my fingers. Result … one very smelly, sticky page!!
While I was in the kitchen I thought I might as well do the tongue painting page!!

Tongue Painting!
I used food colouring straight from the bottle …. quite a colourful result!! The journal is getting quite hard to close now …
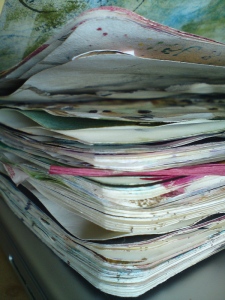
Expanding Journal
… in more ways than one!! It’s so freeing and inspirational … and I’ve still got loads of blank pages!!
More Inspiration from Kelly Rae Roberts
I started reading Kelly Rae’s book nearly two months ago and have been meaning to have a go at making the art journal in chapter one for ages. I finally made a start this weekend! I started by making the fabric tags for the spine.

Painted Material Collage
I’ve been using wonderweb and iron on interfacing to create material collages for some time now, but I had never thought to paint on top of it! You need the clear gesso as a base, but once that’s added – it really is like painting on paper.

Collage made into tags
The letters were added using a black Sharpie and a white Sakura Souffle pen. The eyelets were added using a Cropodile Big Bite. I really love this process and the way the tags feel!
Next I made a start on the front cover of the Journal. I was a bit nervous about adding a person, and wasn’t sure which media would be best to use as I don’t have any oil paints …. but in the end I plucked up my courage and just used my acrylic paints.
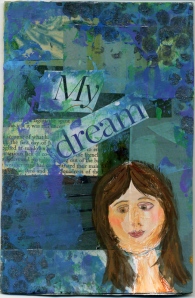
My Dream - Mixed Media Art Journal - Front Cover
Considering it’s my first attempt at anything like this – I’m quite pleased with the result 🙂
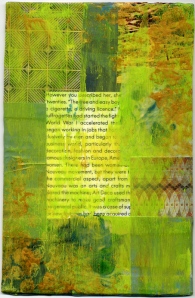
My Dream - Mixed Media Collage - 1st page
This is the inside of the front cover all ready to be written on!


