


Finished Page!
At last all the layers have dried and it’s safe to scan the finished page.
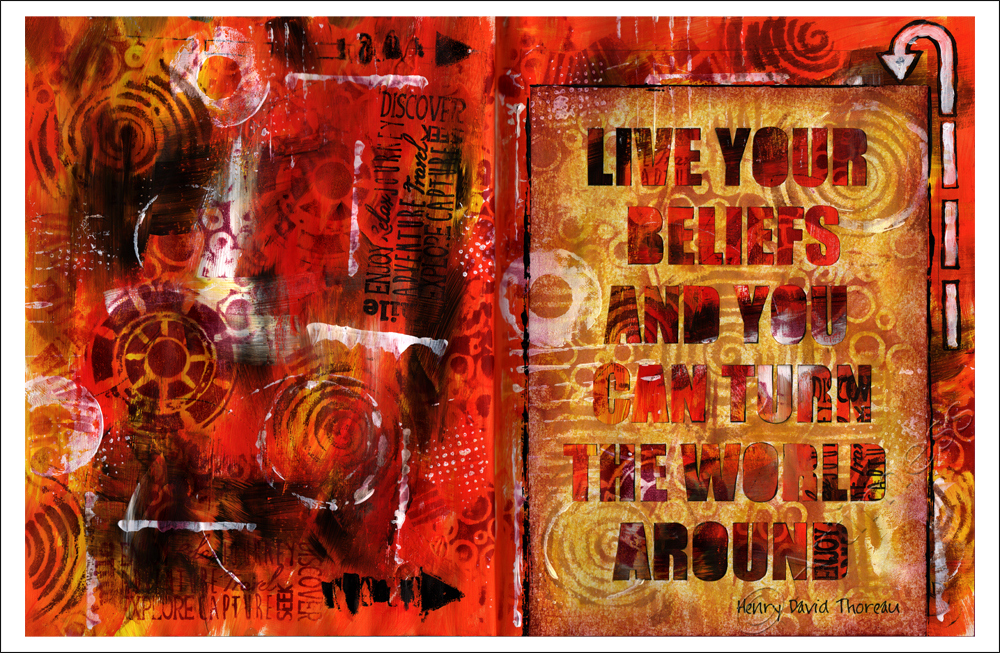
I love how the finished page turned out, and I had such fun making it. The only tricky part was managing the wet media on the thin pages of my new journal, but I managed that by starting with a thickish layer of white gesso and using the acrylic paint with a dry brush. What I love is that you can still see some of the original pages through the layers in places!
Just for a change my ‘ingredients’ list is quite short! I started with white gesso, added layers of acrylic paint, and stamped using various clear and homemade stamps with a staz-on ink pad and some distress ink pads. I printed the quotation onto plain white copy paper then cut out the letters by hand, leaving me with a stencil affect. I coloured this using distress ink pads, then stuck it to the page using a glue stick. Lastly I added some more acrylic paint using an assortment of household items!
![]()
Mixed Media Madness!
I’ve been working on a mixed media piece in my new journal for the last couple of days and experimenting with the camera on my iPhone as well.
Inspired by this post from Julie Fei-Fan Balzer, I spent a while cutting out this quotation to use on my new page.

After I’d finished the cutting out, I downloaded the Snapseed app and took this photograph to play with on my new app!
Today I was working on the background, and scanned in the different stages to use as future collage material. As is often the case, I got sidetracked into doing some digital blending 🙂
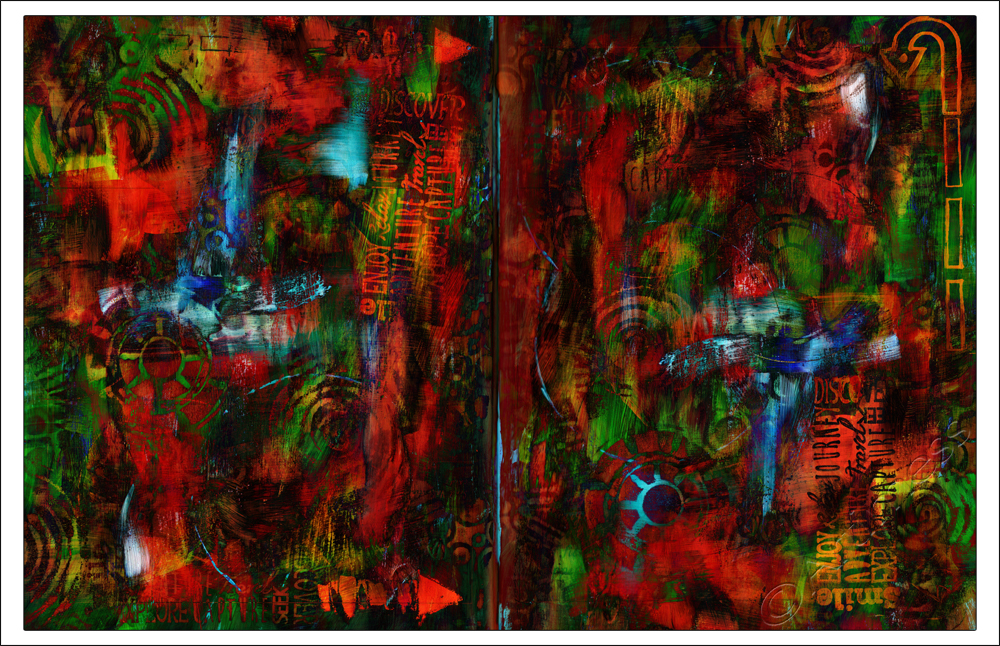
This is the result – pretty colourful, yes? You’ll have to wait till tomorrow to see the finished page as the final layer is still drying at the moment!
![]()
On the move!
We’re on the move again! I got accepted onto an MA Art Psychotherapy course to start in September and we’re in the process of moving house so that I can be nearer to the course.

Right now we’re surrounded by boxes in various stages of being packed!
As we could well be without a broadband connection for a while after the move, I thought I’d better try out posting from my iPhone 🙂 ……Hopefully this will work!
Blogalong with Effy!
I’ve not been blogging very regularly of late, so when I got effy’s newsletter today and saw that she was hosting a blogalong during August, I thought it would be a good idea to sign up in an attempt to complete thirty posts in thirty days!

Meanwhile, I’ve been back to playing catch up with the Life Book 2013 lessons. I started with Danita’s great class entitled Key to Freedom. The class started with a link to this cool podcast from Tarah Brach
The theme of the lesson corresponded exactly with the July Rumi Project quote over at the Glitterhood, so I had to incorporate it!
“Why do you stay in prison,when the door is so wide open?”

I started out by drawing the girl and the cage in pencil, then painted them using masking fluid before journalling on the background using a white gellyroll pen. I then painted over everything using Twinkling H2O’s. When everything was dry, I peeled off the masking fluid, coloured the girl using neocolour crayons and painted the cage with Twinkling H2O’s. Lastly I wrote the Rumi quote using a white Uni Paint Marker.
This week’s class was from Dina Wakley.
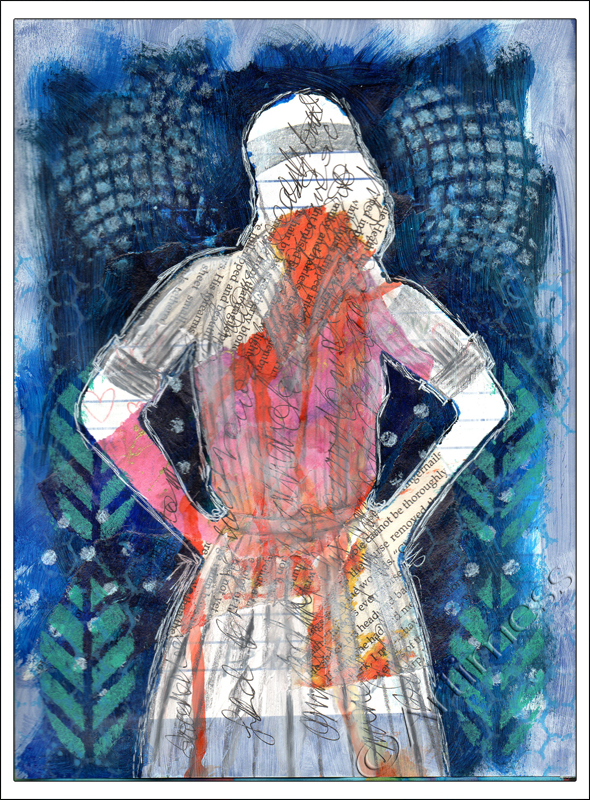
I started the page with a coat of white gesso then added some collaged book pages and old scanned artwork. Next I dripped some ink down the centre of the page and journalled across it, then placed a silhouette mask I created over the top and used acrylic paint to cover most of the page around the mask. I used stencils to add some interest to the background, and lastly, added some detail to the silhouette using a Stabilo All pencil and white acrylic paint. I found creating this page very therapeutic – thank you Dina.
![]()
Recycled Journal

Ever since I saw Rae Missigman’s ‘Go Green’ class on 21 Secrets 2013 I have been longing to have a go at making a recycled journal following her instructions. I have been an avid recycler for many years and have made use of many books in art projects, but I have never before taken one apart and reconstructed it, so this was a new adventure for me! My first step was a trip to my local Charity Shop to find a suitable hard back book to turn into my journal. These are the before and after pics!.
As usual I couldn’t quite bring myself to follow all the instructions…

… plus I didn’t have all the recommended ingredients, so I improvised a bit! The biggest change I made was to the binding. Because I had 7 signatures and my pages were quite heavy, I thought it better to use a different binding format to the one Rae taught. I used this brilliant tutorial from Sarah to learn how to do the binding the way I wanted.
But I digress! Having chosen and purchased my book for the princely sum of £1, the first task was to very carefully take it apart, removing all the signatures. Next came the fun part of decorating the cover, followed by the much trickier part of reassembling it into a book again! I started the decorating process with lots of layers of gesso, clean and painty tissues, and coloured inks dripped and sprayed. Once I was happy with that I added some scraps of material which I machine stitched very carefully to the cover – I only broke one needle in the process! Then came the embellishments which I added using hot glue and a material wrap to keep it closed. I am always envious of my American peers who seem to be able to purchase waxed bookbinding thread in assorted colours quite easily. I always end up waxing my own thread – and getting melted wax all over my cooker! With most of the book pages safely restitched within the covers I moved to inside the book.
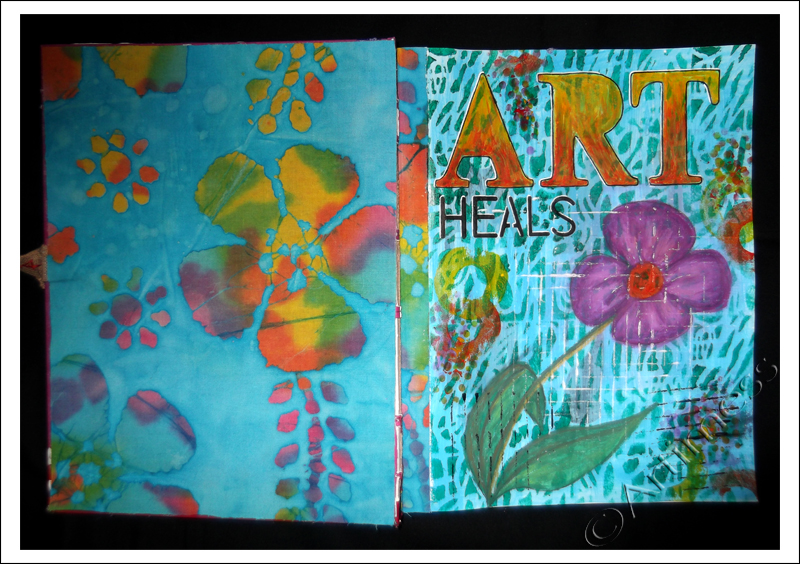
I covered the inside of the covers back and front with fabric which I stuck in using iron on fabric glue, then set to work creating a title page for the book. I started off with a layer of gesso, then added several layers of acrylic paint using a mixture of stencils and assorted stamping implements. I used letter stencils to create the titles and neocolour crayons to draw the flower.
I’m really pleased with the way the book has turned out and can’t wait to work on some more pages! Thank you Rae for a really inspiring Class.
![]()
Kaleidoscope Mandala!
I have been busy painting and working on Rae Missigman’s 21 Secrets 2013 Class, but I have nothing to show yet, so I thought I’d share some digital playing instead. I was catching up with my reading list yesterday and came across this post from iHannah about creating digital kaleidoscope mandalas. Well – I just had to give it a try, didn’t I!

I decided to use my Face Emotions image as the source and had great fun playing. iHannah’s instructions are very helpful. I created four mandalas, but that wasn’t enough for me. After downloading the results I had to play digital blending to take it that little bit further! This is the result.
Thank you iHannah for the inspiration, and thank you SumoPaint for a nifty piece of software.
New iPhone Case
I really liked the monster in my Finding Faces picture, and fancied having a go at using the image to create a case for my iPhone so I hunted around the internet to find a Uk based company I could use. The company I finally chose was photobox.

The whole process of uploading the image and placing the order was very simple. I placed the order at 00:29 on the 4th July, got confirmation of despatch later in the day on the 4th July and the case was delivered today (5th July) at 11am. Now that’s what I call service!! I love the way the phone looks in it’s new case.
![]()
Faces and Emotions
The last part of Misi B’s Life Book 2013 Class was to journal about emotions on the back of the page then to draw a group of faces showing different emotions. Not the easiest thing in the world for me – but I gave it a go!
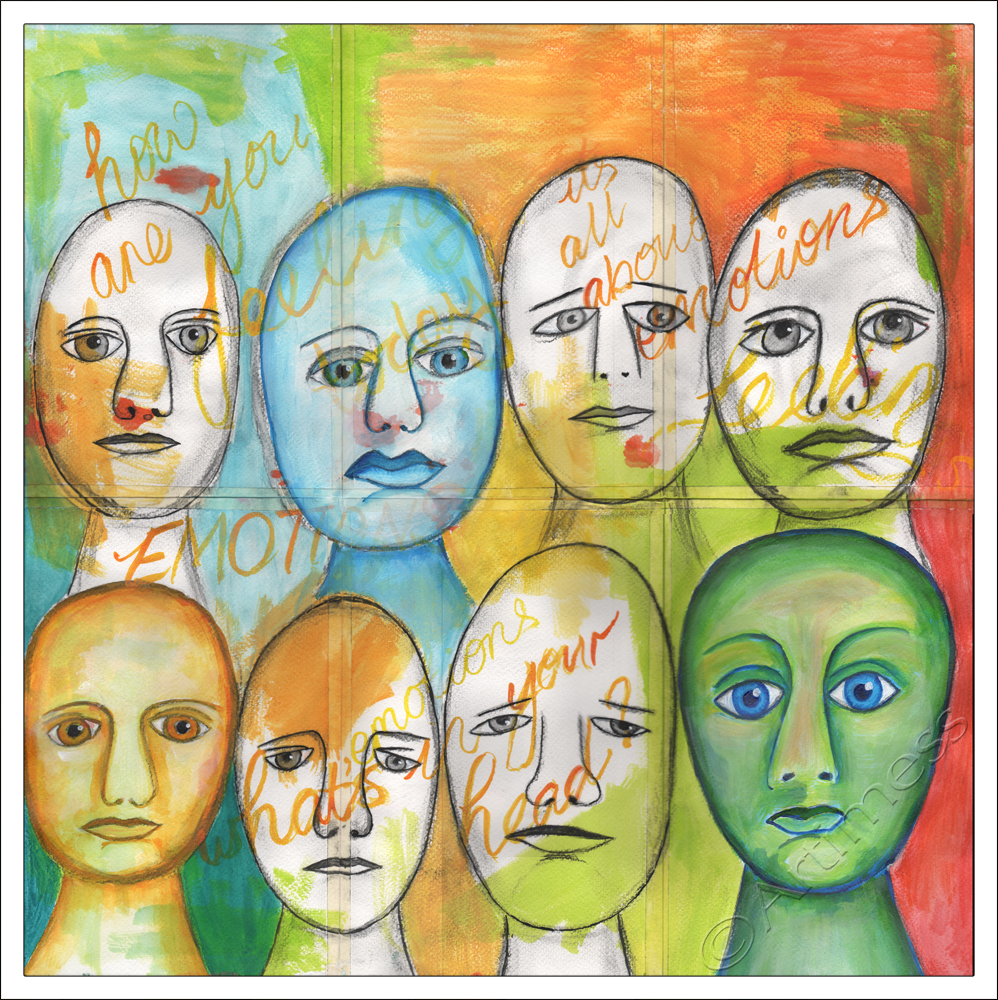
I ‘wrote’ the journalling using acrylic paint, added some colour to the background, then drew the faces using a charcoal stick. I coloured some of the faces using acrylic paint, then coloured the remaining background using a mixture of acrylic paint and neocolour crayons. Finally finished! Wow – that was some class Mitsi – thank you so much – I learnt a lot!
![]()
Finding Faces
Today, I was very brave, despite serious doubts about my ability to do this, I sat down with a piece of charcoal and my acrylic paint and found the faces in my background. Very scary stuff!!
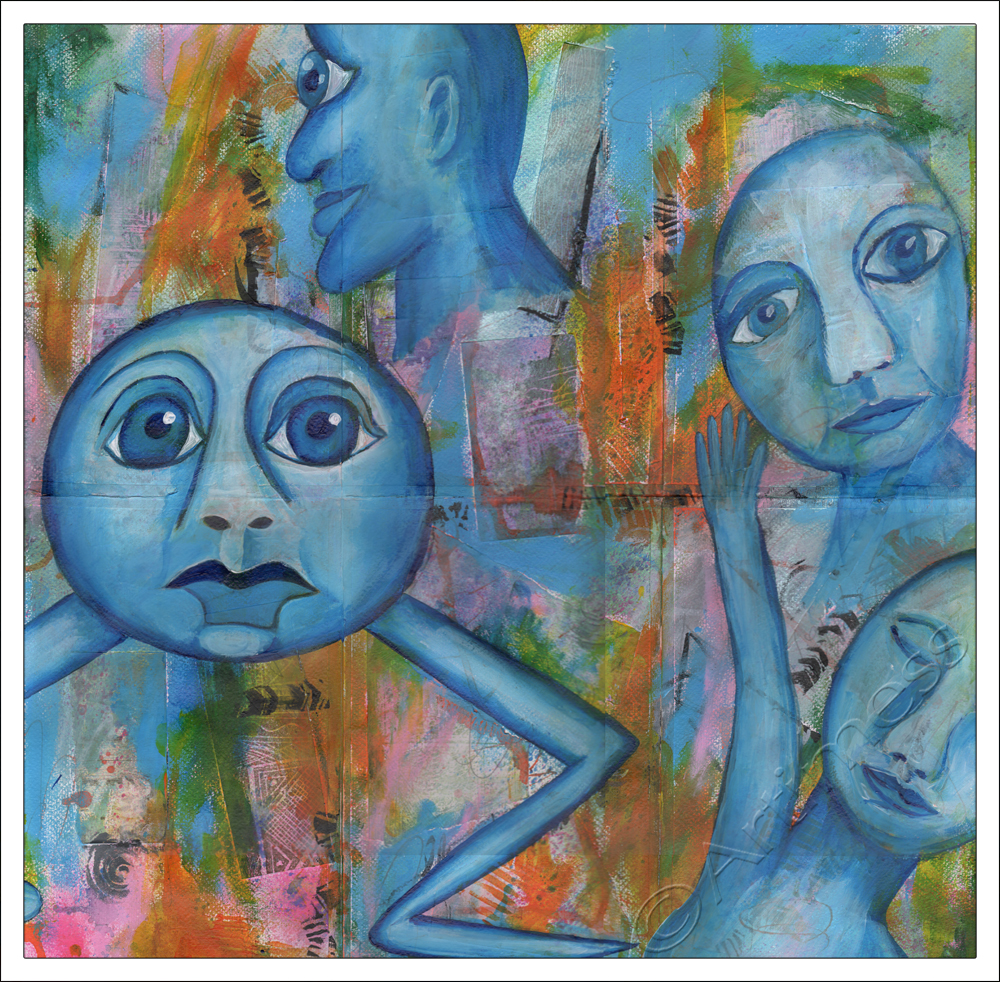
The first two faces on the right were easy to find. The third face top left took a little longer. Then I got stuck! I had this big space with nothing in it and I just couldn’t see another face. But I could see a rather strange looking leg. I didn’t have the courage to start drawing straight on the background, so I copied the leg onto the newspaper I was using to protect the table. The result was the little monster bottom left! Wow! – I’m quite impressed with how this turned out! What do you think?
![]()