Coming Home!
After my travels over at Face of Love, I’ve decided to return to Artimess to continue my messy exploration of all things creative.
Since I completed my Wreck this Journal book I’ve been through a slightly more structured phase in my creativity, but I’ve decided it’s time I came home to Artimess and started having fun again!
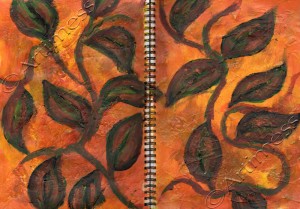
I signed up for Tamara Laporte’s Life Book Course back in January and have been joining in rather haphazardly throughout the year. Last week’s lesson by Connie Hozvicka from Dirty Footprints Studio caught my imagination. The picture above is my interpretation of the lesson. Created on watercolour paper (2 x A4 sheets), using glossy gel medium as a base to build texture followed by lots of layers of acrylic paint to add depth and more texture. I had great fun creating this – thank you Connie!
Mouth Writing!
Every year about this time I receive a pack of beautiful cards, prints of pictures painted by mouth and foot artists. I have always admired their work and wondered how they manage to paint such beautiful pictures. I now have even more admiration for them having just completed this page of mouth writing for my journal …..
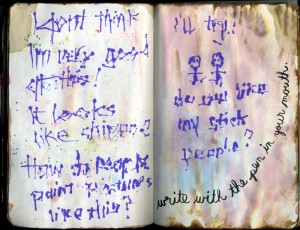
Write with the pen in your Mouth
…. it was so hard to do …. it says “I don’t think I’m very good at this! It looks like Chinese. How do people paint pictures like this? I’ll try. Do you like my stick people?” …. I think I need a lot more practice 🙂
Not content with just making a beautiful mess in my journal, I love taking the scanned images and blending them to create more beautiful images. I started with this pen drawing …
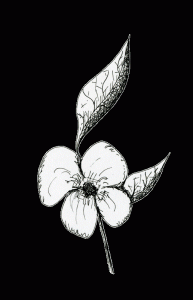
Pen and Ink Flower
…. and blended it with the scans of the “Document Your Dinner” and “Sample Various Substances” journal pages with these results ….

Flower Blend 1 - Flower added to scan of "Document Your Dinner" journal page

Flower Blend 2 - Flower added to scan of "Sample Various Substances" journal page
Finally … I just discovered this JigZone site that makes jigsaws out of your images. How cool is that!!! I just had to have a go 🙂
I’ve made two so far and posted them on the Pick a Puzzle page. Have a go and see how long it takes you to do one!
Keep checking … I’ll add some more later.
Ironing My Images
No … I’ve not gone completely mad … I really have been ironing my images! I’ve been trying out another technique from the Image Transfer Workshop Book. By some magical process (the physicists out there will be able to explain exactly how it happens) heating a magazine page that is next to some cling film (plastic wrap) enables the two to bond. You can then remove most of the paper backing which leaves you with a new very thin, waterproof version of the image. Clever stuff!! This is my first attempt … and I’ve stuck it in my altered fiction book before adding paint to the page.

Cling Film Transfer
I’ve been busy completing more pages in my Wreck this Journal as well. This page was done using the Gel Medium method described in my last post. I used last week’s church bulletin (which was printed using an ink jet printer). I love the distressed look this method gives to the transfers!
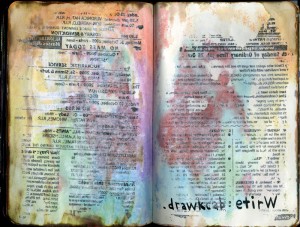
Write Backwards - Ink Jet / Gel Medium Transfer
I’ve been struggling over what to do with this next page for some time. The page was headed “Space for Negative Comments” – not something I thought was very constructive! But then I thought … what if I wrote my negative thoughts in thin black pen and wrote their opposite on top in thick red pen – it would be following the instructions, but putting a positive spin on it. So that’s what I did! Next I painted the opposite page and squidged them together to transfer some of the wet paint. That obscured some of the words, but it was still too legible for for my liking, so I added a blur filter to the right hand page after I scanned it!
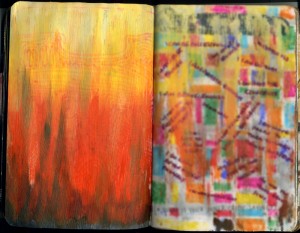
Space for Negative Comments
… sorry … you don’t get to read my secrets … but I like the way it looks 🙂
Simple Image Transfers!
I’ve been wanting to try out image transfers for such a long time … but every time I’ve found a set of instructions they’ve involved using substances which were either dangerous or else difficult to obtain. So imagine my excitement when I came across this book, Image transfer Workshop by Darlene Olivia McElroy which has a huge variety of very simple step by step instructions for transferring images, many of which use common safe substances! I’m planning on trying them all over time, but I started with the ink jet / gel medium transfers as they were so simple. All you need is a pot of Gel Medium, a paint roller/brayer and an ink jet printed image!
The image on the left-hand page of a rose bud is my very first attempt … pretty impressive I thought. I got so excited with my success that when I did

Glue in a Photo
the next one, after remembering to reverse the image when I printed it, I stuck it to the page upside down!! Luckily it was in my Wreck this Journal Book so I figured it was meant to be!!
This next transfer forms the first completed page in my creative business plan which was inspired by The Right-Brain Business Plan devised by Jennifer Lee. The page is in the middle of

Development and Growth
the book I have made and I have written ” Development and growth are vital to my business. I need to experiment, experience, and constantly be trying out new ideas. Having Fun!`’ around the the image. This is much more fun than a traditional business plan 🙂
This last image is my favourite of the lot! Inspired by my Wreck this Journal Book, I have decided to alter one of the many fiction paperback

Celebrate!
books I have littered throughout my house waiting to be taken to the charity shop. I love the way the text looks like it’s been aded after, when in fact it’s the only bit of the original page that you can see!
I can’t wait to get started on trying out some of the other techniques in the book … keep watching this space!
Green Thumb …
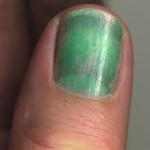
Green Thumb
It all started last week when I taught leaf printing at one of my craft classes. I get so much inspiration from teaching! … I came away from that class inspired to find as many ways as possible of using leaves.
A few weeks ago I came across several cans of spray paint left over from previous projects … so I decided to try using them with the leaves, and the ‘Sample Various Substances’ page seemed the perfect page in the journal to use for the experiment.
After I’d picked a selection of leaves I used them as both masks and stamps to achieve this effect.
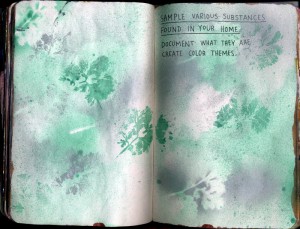
Sample Various Substances ...
Using leaves for printing, you end up with some beautiful colourful leaves. I took a couple of the ones I brought home from the class, covered them in Gel Medium and used them to create this picture.
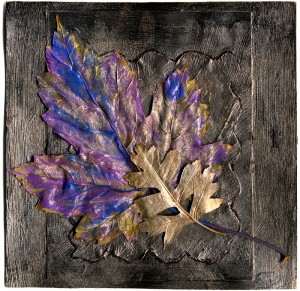
Leaf Printing Leftovers!
Going back to my journal, I decided to do something with the ‘Document Your Dinner’ page. I wasn’t prepared to feed my dinner to it, so I did the next best thing and used a heap of favourite ingredients to splatter over the page. I used Soy Sauce, Spaghetti Sauce, Strawberry Sauce, Lemon Juice and Salt!
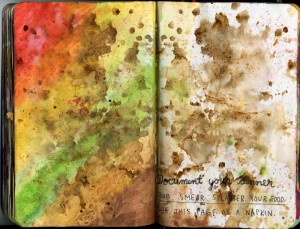
Document Your Dinner!
I’m quite pleased with the visual effect … and it’s added yet more interesting aromas to the journal – it really is a multi-sensory experience!!
Sleep With The Journal? ….. No Way!!!
Sleep with the Journal? …. No Way!!! It’s much too lumpy and there are far too many sharp bits sticking out!! Instead I altered the instructions and created new ones!!
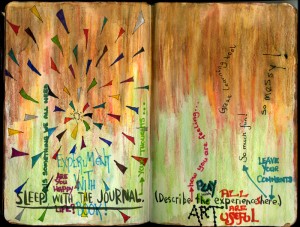
Sleep with the journal? ... No Way!!
It now has a series of statements/ instructions:
Sleep is something we all need
Are you happy with Life?
Experiment with the book!
Journal your thoughts …
Descibe how you are feeling …
Play with the art
All experiences are useful
Leave your comments here
I then coloured the pages using a water colour pencil wash, and added an explosion of colour to the left page! I may well add some more comments to the right page as I think of them 🙂
This next page evolved as my doodles are inclined to do!! I had no intention of drawing a face when I started out … it just ended up that way!

Doodle Over the Top of the Page
The left page evolved after I used it to try out some new rubber stamps I got from the SSP Guild on Saturday morning. It just reminded me of these words from an old Dave Clark Five song called Here comes Summer (Showing my age there!!) Only trouble was … the page got really wet after I wrote the words and they bled everywhere!! So I wrote over the top again. I think it looks even better now!! What was that I was saying about accidents improving artistic content? (see bottom of last post)
Following another set of instructions …

Coloured Page Edges
… I coloured the edges of the pages using Perfect Pearls from Ranger. It would have been easier to do at the beginning before the book got so fat!! 🙂
….. A Bit Early for Christmas …… !
I know it’s a bit early for Christmas …. but I’ve been making paper chains!
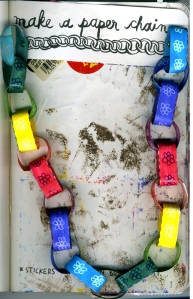
Make A Paper Chain!
Not full size ones, just one mini paper chain made from a page of my Wreck this Journal book! I coloured the strips with Sharpies, then drew flowers on them using Sakura Souffle pens. Lastly I glued them together and attached them to the journal using mini brads.
I started this doodle ages ago during a long telephone conversation with my brother. Then it got put aside and I forgot about it for a while. So when I stumbled across it the other day I thought it was about time I finished it!!

Pretend You Are Doodling ...
I used a very fine Copic Multiliner pen.
The word I chose for this next page is the Artist in me acknowledging her presence!
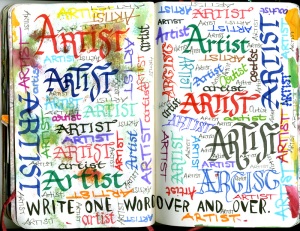
Write One Word ...
I used some cheap Calligraphy pens from Asda for the calligraphy (which as you can see – write beautifully), and a mixture of other markers for the rest of the writing.
The journal is getting soooo thick now …. I have a job to hold it and I still have loads of pages to do!!! So much fun 🙂
Losing, Tearing & Four Letter Words ….
Losing, tearing and four letter words …. yes … I’ve been wrecking again! But I must confess …. I haven’t actually lost the “Lose this Page” yet …
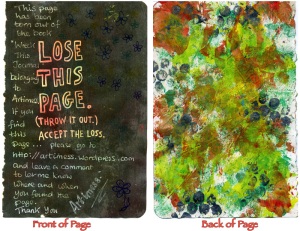
Lose This Page - writing asking for finder to contact and leave comment on blog
… I just tore it out of the book and got it ready for losing, which of course involved writing messages on it and splattering paint all over it’s other side! I may add some writing on the painted side before I lose it [maybe the secret message to hide] but only the person who finds it will know for sure!!
When I first tore the strips on this page…
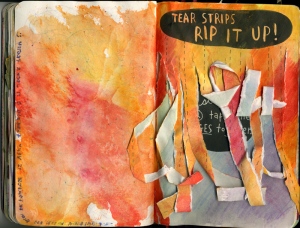
Tear Strips - Rip it up!
… they curled up and looked really pretty, but by the time I got round to scanning the page they’d got well and truly squished … much more wrecked looking!!
I thought I’d make my four letter words colourful …

A Page for Four Letter Words
… I used my nice new sharpies which look really great here … but they bled through several pages on either side … definitely journal wrecking! I’ll have to find ways to incorporate the back to front words into those pages … maybe rename the pages and call them the write backwards pages!! …. Keep watching 🙂
Digital Comment on yesterday’s circle page …..
I just couldn’t wait to play with yesterday’s circle page, so this morning I started playing! First I created these three 12×12 papers which you can download free by clicking on the link in the right margin.

Circles in Pink and Purple

Circles in Red and Blue
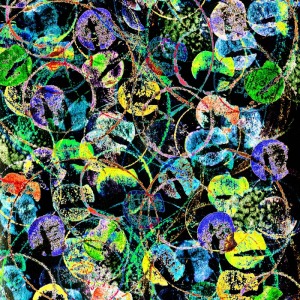
Inverted Circles
Not content with that – I then created my own digital scrapbook journal page. I hope you like it 🙂

Playing with Textures
The circle inserts are taken from pages in my Wreck This Journal Book – Do you recognise them?
Golden Gel Mediums
I’ve had my eye on them for some time now … coveting them!! Yesterday … I gave in and treated myself to this starter set of Golden Gel Mediums!!

Golden Gel Mediums
Having waited so long … I just had to have a play, and what better place than on the Draw with Glue page in my ‘Wreck this Journal’ book. I wasn’t too sure how to go about using them, so I tried a few different approaches … but the one I liked best was using an old rub-on stick (like an old fashioned lolly stick but made of plastic) to dob the gels onto the paper and then add some colour in the form of lumiere paint. The scanned image really doesn’t do justice to the amazing textures …
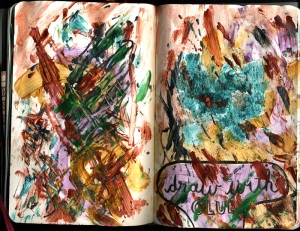
Draw with Glue
… I just have to keep stroking the page 🙂 I can’t wait to use them on a serious project!


