






Mixed Media Fun!
Yeah! – at last, I got to play mixed media!! I had so much fun!
I finally got the courage this year and signed up for 21 Secrets 2013. As I have never really done any proper art journalling, I treated myself to a smart Strathmore Mixed Media Journal – it was a dream to use, and just the right size!
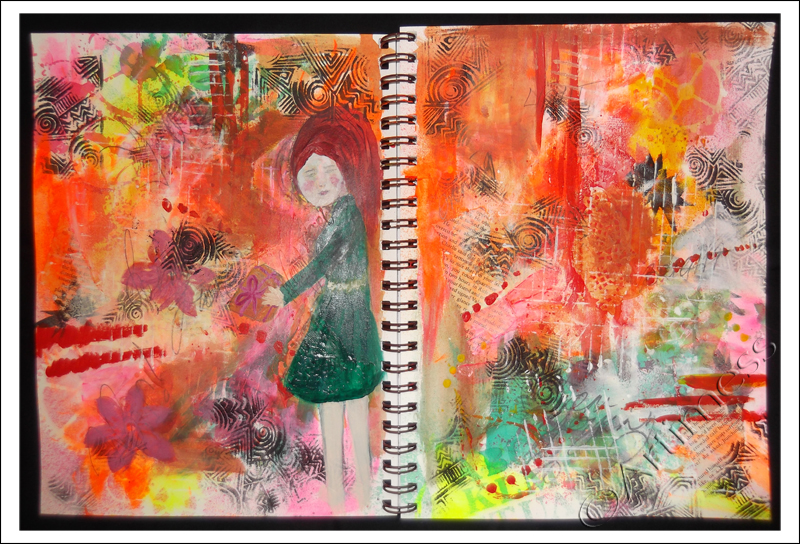
This is my play page, which I’ve titled ‘The Gift’, inspired by the class from Carissa Paige. I played with acrylic paint, ink sprays, stencils, foam stamps, staz-on ink pads, collage, and graphite pencils. I found the girl in green holding ‘The Gift’ lurking in the painty mix. Thank you Carissa for the gift of freedom you inspired with your class. I know I had fun – I’m still picking the paint and gel medium off my fingers!!
I made an interesting discovery when I tried to scan the finished picture – my scanner does not ‘see’ luminous acrylic paint, and as I used rather a lot, it left the colours looking a bit flat! So I spent ages trying to get a good photo which didn’t have too much reflection! Has anyone else discovered this problem?
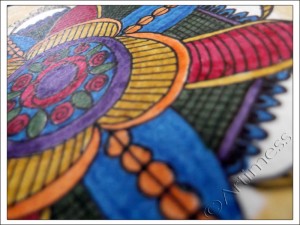
Last but not least – I received my ninth postcard this morning all the way from Australia – a wonderful hand drawn mandala from Lulu – beautiful! Thank you so much. Only one more postcard to go – then it’s all over for this year – it’s been so much fun! I’ll have to hunt around for another swap to take part in. Anyone got any ideas?
Now I’m off to play mixed media in the next part of Carissa’s class!
Beautiful Postcards
I had so much fun in March making 10 postcards to send out around the world as part of the iHanna Postcard Swap 2013, but this month has been just as much fun seeing what the postman has brought me every day.

These are the postcards I have received so far – aren’t they beautiful! And they came with lovely messages from all around the world. Thank you so much Hanna for all your hard work to make such a swap possible.
Yesterday I had every intention of getting messy and grungy and playing mixed media games, but life decided otherwise! So instead, I created another Quirky Bird. This one’s called Freda!

I painted her on calico, after using clear gesso to seal it. My original intention was to paint her using the natural calico colour as the background, but I made such a mess of drawing her, and the pencil lines wouldn’t rub out, so I ended up painting over the background to hide the mess!!
She’s painted using acrylic paint, neocolour crayons, Edding 780 paint marker and Pitt artist pens. Despite the early disaster, I don’t think she’s turned out too bad.
And now your must excuse me – I have an overdue date with some messy mixed media grunge!!
Quirky Bird Bug!
Yes, I have definitely got the Quirky Bird Bug – I can’t seem to stop drawing them!

This time I decided to try painting one on material. I primed the material using clear gesso then painted the bird using a mixture of acrylic paint and neocolour crayons exactly the same way I did on the paper. I’m really pleased with how it turned out – I love the way the pattern on the material shows through in places under the paint.
Drawing birds has kept me from finishing my latest zentangle canvas, but today I finally finished it – number five in the series!
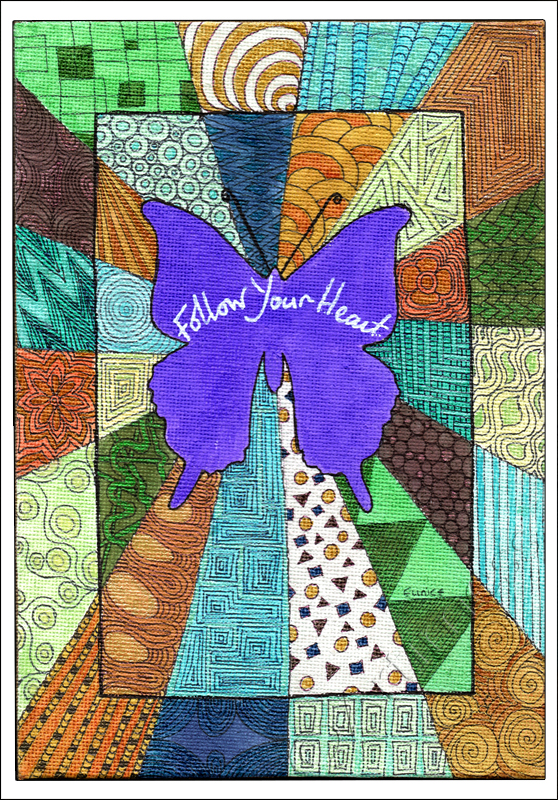
I decided to try drawing with some Pitt artist pens as the unipin pen nibs were wearing out so quickly! The Pitt pens are lovely and very waterproof, but I think it must be drawing on the canvas – they’re wearing down too! As before, I used the luscious Twinkling H2O’s to add colour to the image.
Maybe some mixed media paint splashing will cure me of the Quirky Bird Bug – keep watching this space!
More Quirky Birds!
Carrying on with this week’s Life Book 2013 lesson from Tamara, I got a bit carried away with drawing quirky birds. I drew four instead of two! – oops!!!

These are painted on the back of the other four and the whole image folds up like a concertina. Like the others, I created the background using spray inks and stencils, followed by neocolour crayons and acrylic paint and stencils. When it was all dry I covered it in clear gesso then drew the birds using pencil and coloured them using a mixture of acrylic paint, neocolour crayons, Edding 780 paint marker and unipin fine line pens.
I completely missed out the journalling part of the lesson!! I may add it later, or I may just skip it, I haven’t decided yet. I’ll let you know when I decide… keep watching this space!
Quirky Birds!
In this week’s Life Book 2013 lesson from Tamara she taught us how to draw these quirky birds. They were so much fun!
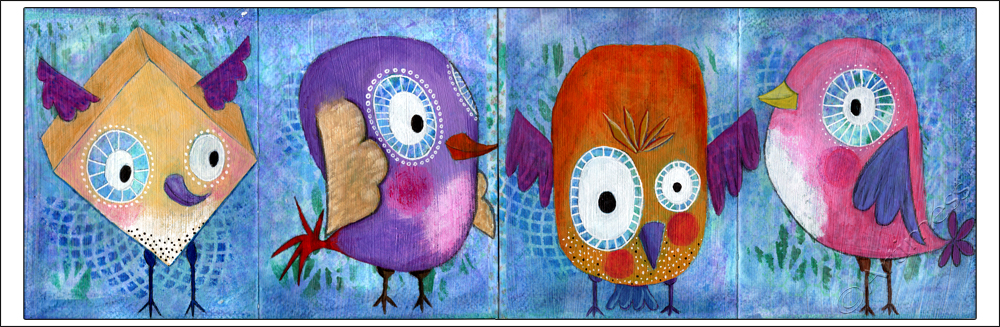
I created the background using spray inks and stencils, followed by neocolour crayons and acrylic paint and stencils. When it was all dry I covered it in clear gesso. I drew the birds using pencil, then coloured them using a mixture of acrylic paint, neocolour crayons, Edding 780 paint marker and unipin fine line pens.
I haven’t finished the lesson yet, so I’ll post some more pictures when I’m done.
Gratitude!
Still playing catch up with Life Book 2013 classes, today I finished this piece for Tam’s week 10 lesson.

I decided to add my own twist to the lesson by folding my paper in half and cutting a heart shape in the front half to make a heart door. After cutting the door, I started the background using acrylic paint, then added a collage of printed tissue paper, washi tape, and paper ribbon. Next I used Caran d’Ache neocolour crayons and stamping with a staz-on ink pad to add more colour, then finished the front using die cut letters. Once it was all dry, I taped in the ribbon ties and stuck the two halves together.

On the inside, I covered the back of the door with torn tissue paper and gel medium, then set to work making the mini scrolls for the centre from a mixture of torn magazine pages and digital design prints, decorating some of them with stamping. I filled the heart shape with gel medium, and arranged the scrolls on top. Lastly, I made the ‘Gratitude” banner by sticking some die cut letters on a scrap of digital design paper.
I had great fun with this lesson – thank you so much Tam!
Monster Pop-Up!
I have always loved pop-up cards so this Life Book lesson from Mitsi B really appealed to me, and I loved every bit of the process of making it.

I started by journalling over both sides of the paper using a water soluble graphite stick, then activated it to stop it bleeding. I added big blocks of colour using acrylic paint, then splattered and dripped a bit over it all.

Next I made the pop-ups for the inside of the card. Owing to my inability to listen to/read instructions, my card is slightly smaller than instructed so I had to modify the rainbow pop-up to make it fit! I painted the shapes using acrylic paint, stuck them in and added more journalling using calligraphy pens from Asda and an Edding 780 paint marker to outline the letters.

Finally I painted my monster on the front cover using acrylic paint. Don’t you think she’s lovely? I think this has been one of my most favourite lessons so far this year. Thank you so much Michelle!
Connections!
I’ve got a bit behind with the Life Book 2013 Classes, so I was quite pleased when I managed to finish Mindy Lacefield’s lesson today. I had great fun with it, but was a little unsure of how the whimsies would turn out using Mindy’s draw in paint technique!

I started out by writing 7 quotations about connections on the right hand page, then used various stencils with homemade ink sprays to create a background and partially hide the journalling. Next I used various stamps with distress ink pads to add some more detail to the background and did some acrylic finger painting. Lastly, I painted the whimsies with acrylic paint and used a pilot gold marker to add belts to their skirts.
This is my first ever attempt at drawing people using paint, pretty scary, but I’m quite pleased with the result!
Playing with Stencils
Since finishing my postcards, I have been busy playing with the new stencils I got last weekend. I always start my playing in my everyday notebook/journal, which is not quite big enough for the whole stencil.

I had a tiny bit of Light Molding Paste left in my pot so I thought I’d try it out with this Creative Expressions stencil. When it was dry, I painted it with acrylic paint, then added some green Perfect Pearls using a Versamark ink pad. Just to finish it off I added a shadow to the circles with a Unipin fine line pen. The scan really doesn’t show the lovely sparkly finish of the perfect pearls.

As I’d run out of texture paste, I thought I’d try creating a texture using some black gesso with this TCW stencil. At first I thought it had worked, but when it dried, it went rather flat! So I decided to add some colour to it using acrylic paint. I’m quite pleased with the way it turned out.

This last image is a digital blend of two scans of earlier acrylic paint prints using the two stencils above. I just love how many different effects it’s possible to get using stencils!
Handmade Postcards
Last Sunday we travelled to Harrogate and visited the Great Northern Papercrafts Extravaganza – great fun! I got some really cool stencils, stamps and dies which I have been playing with this week.
On Monday I signed up to take part in the iHannah’s DIY Postcard Swap 2013. (There’s still time to sign up if you’re interested, you just have to pledge to post 10 handmade cards by 30th March.) So I have been busy this week making my ten cards for the swap.

I started by creating a set of coloured backgrounds using Inktense Watercolour pencils. Next I added a contrasting colour using Acrylic paint and an Artist Cellar Stencil followed by a stamped image from IndigoBlu using a mixture of distress ink and staz-on ink pads. I followed this with a layer of gel medium to seal everything and to stick on the word definition tags, which I created using more stamps from IndigoBlu and a Creative Expressions stencil, and the die cut letters from memory box. Lastly I added another layer using the same stencil with acrylic paint.

I created the backs of the postcards using a free postcard backside from iHannah which I had to resize to fit my postcards, then added a digital stamp which I made using a scan of another Creative Expressions stencil, some hand drawn bird shapes and a quotation from Friedrich Nietzsche.
The completed postcards are now sitting waiting for their recipients addresses to be added!