


Another Journal Page!
Following on from yesterday’s success, I’ve managed to create another journal page using the scanned digital technique. Yay!

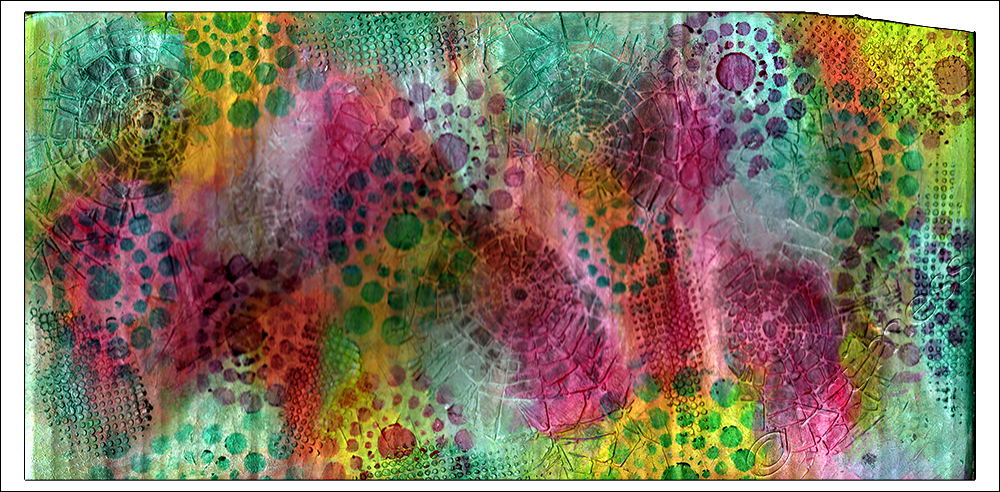
This is the background I created in my altered journal using acrylic paint, home made stamps and stencils.

And this is my digital interpretation of todays ‘When Frogs Sing’ journal prompt.
I finally got around to processing the second of my recycled cardboard paintings from the other day. I created it using acrylic Paint, acrylic ink, stencils and moulding paste.

You can’t really see the relief on the big picture so I took a couple of detail pictures to show it off. It makes a lovely textured surface – I really love texture!
And you know what – I haven’t played blending for ages! So I just had to try a little blend here! I really like how this one turned out. What do you think?
![]()
Front Room Blend!
![]()
I took this picture of our front room today to show my daughter how the packing was going. I was wondering how it would look if I blended some of my scanned mail art with it …

… this was the first version with just one image blended…

… and this is the second version with another image blended. I can’t decide which one I like best. What do you think?
![]()
Mixed Media Madness!
I’ve been working on a mixed media piece in my new journal for the last couple of days and experimenting with the camera on my iPhone as well.
Inspired by this post from Julie Fei-Fan Balzer, I spent a while cutting out this quotation to use on my new page.

After I’d finished the cutting out, I downloaded the Snapseed app and took this photograph to play with on my new app!
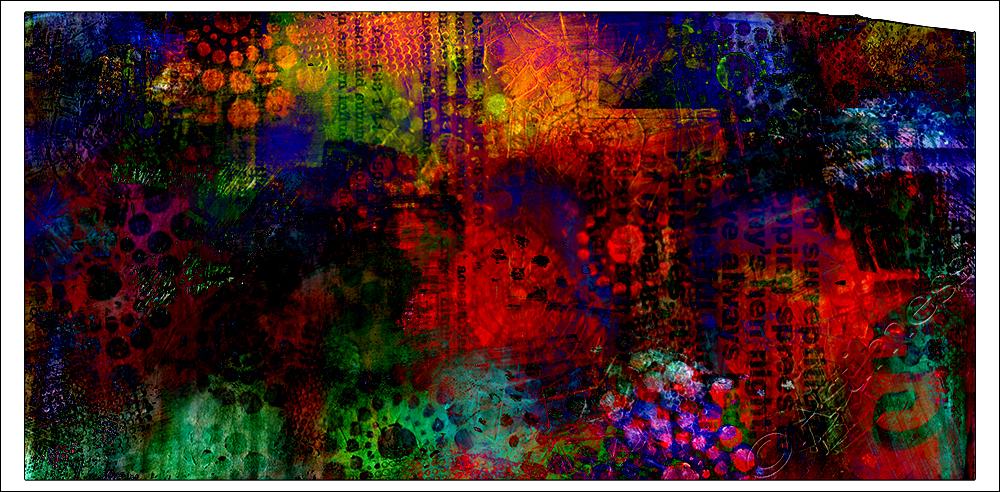
Today I was working on the background, and scanned in the different stages to use as future collage material. As is often the case, I got sidetracked into doing some digital blending 🙂
This is the result – pretty colourful, yes? You’ll have to wait till tomorrow to see the finished page as the final layer is still drying at the moment!
![]()
Digital Wizardry!
Today I started out by sticking a mixture of all kinds of paper to a sheet of watercolour paper. I followed this with a light brayering of white acrylic paint to blend everything together. Then decided I would play some more with the flower stencil I used yesterday and ended up with this image.

I couldn’t decide what to do with it next. So I scanned it into the computer and stated playing. This was my favourite of all the blends I came up with.

I liked it, but I wanted to take it further. It occurred to me that it would look cool as the pattern on a christmas tree shape, so I set off on a hunt for some Christmas tree brushes. I found some beauties here at Photoshop Graphics


Of all the Christmas Tree shapes in the brush set, this was my favourite! But I still wasn’t finished!I decided to create my first Christmas card of the year – well two actually! I think I prefer the one without the writing on the front. What do you think?
Quite a productive day really from one simple piece of artwork!
![]()
More Winter Flowers!
It must be the effect of all the dull winter days at the moment, I just keep wanting to play with flower images, so here are some more winter flowers!

I started off by stencilling the big flowers onto the watercolour paper using acrylic paint – messy, but fun! Then I added some more flowers using clear stamps and a mixture of Staz-on ink pads and distress ink pads. Lastly I scanned the image into the computer, added some more greenery with digital brushes and some more background colour using gradients and blending.
![]()
Snowflakes
Seeing all Leah’s snow pictures last week got me thinking about snowflakes, which in turn inspired me to get some paper and scissors and start cutting! I know snowflakes are supposed to have six sides, but mine has eight – call it artistic license!

I coloured the background using Inktense pencils then cut the snowflake out of white paper and coloured it using distress ink pads applied with cling film. I stuck the snowflake to the background using gel medium then added more colour to the background using the same distress ink and cling film technique.

After I scanned it into the computer I started wondering what it would look like if I played digital blending games! You need to click on this one to look at it large.
![]()
Knotty Blend!
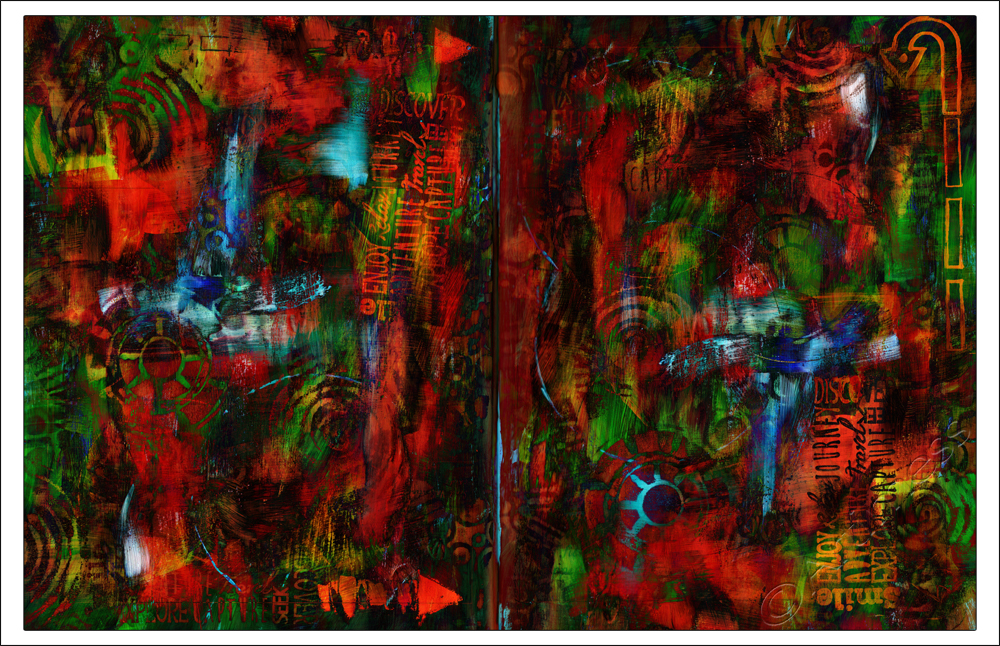
Today I decided to draw a simple knot. I’ve always been fascinated by the way the lines in knot work overlap and intertwine.

I started off by creating a simple background using acrylic paint and a homemade fun foam stamp. When it was dry I drew the knot in the centre of the page, coloured it using a mixture of neocolour crayons and acrylic paint, and outlined it using water soluble graphite pencils.Then I scanned it into the computer.
Somehow it didn’t look quite right, so I added a scan of another image left over from Thursday’s project, blended the two together and ended up unable to decide which ‘blend’ I liked best!

What do you think?
![]()
Freehand Mandala
Playing catchup with the Life Book Course, today I followed Tam’s Freehand Mandala class from week 36.

I hand drew it in pencil, then coloured it using Derwent Inktense Pencils. When I had got to this point with colouring it, I couldn’t decide whether to colour the rest of the background in or to leave it as it was. So I scanned it in to the computer and added some digital backgrounds to see what they looked like. This is my favourite – it really seems to make the colours pop!

After all that, I decided to leave the original as it is. But it was fun playing.
![]()