


Nearly May
Nearly May – and the weather’s still no better. We’ve had a mixture of snow and hail storms this week! But it hasn’t stopped me making art.
I’m really loving working in this A6 journal – it’s perfect for those days when the big journal is too intimidating!
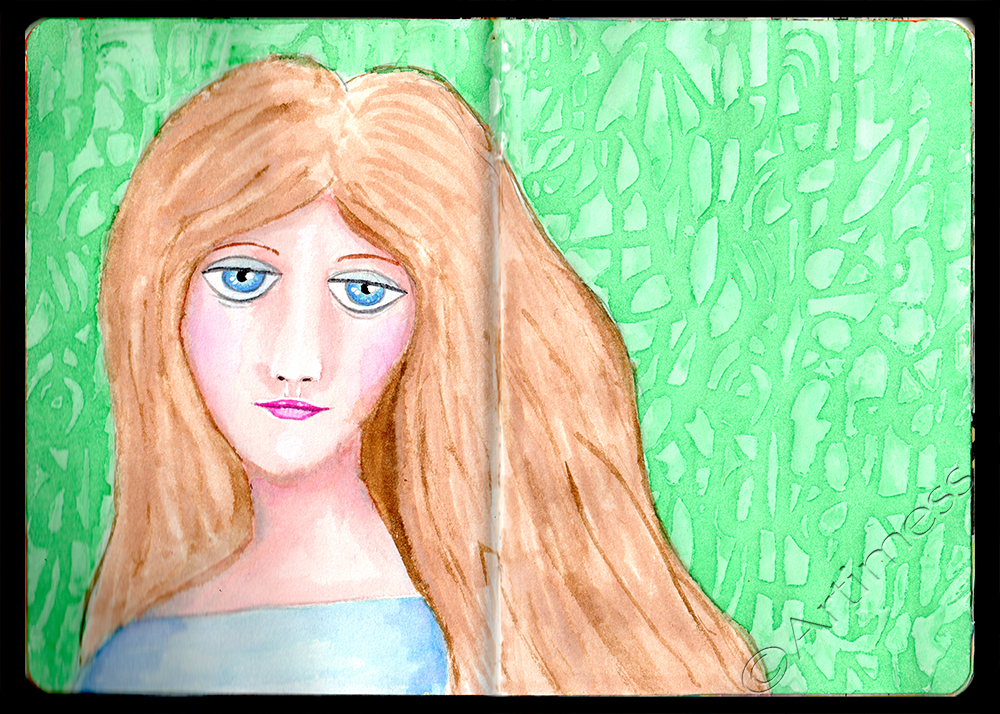
I created this spread using watercolour paints, tombow markers, a stencil and a gel medium resist.
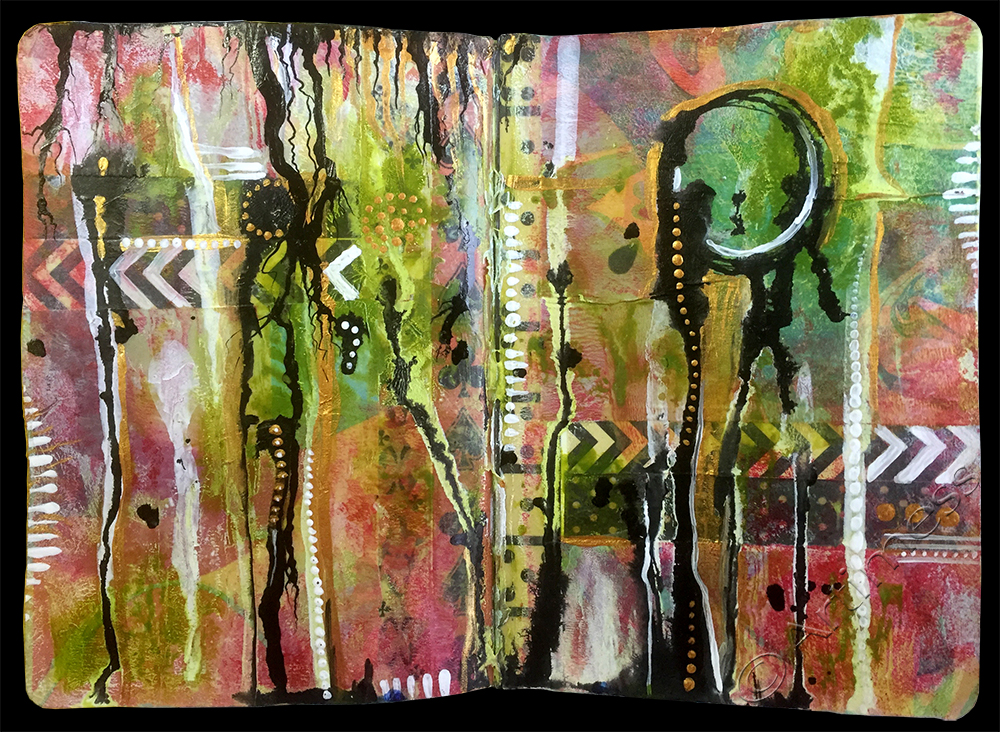
This spread started out as a collage which then got covered up with layers of paint, ink and paint markers. I love the richness of the colours.
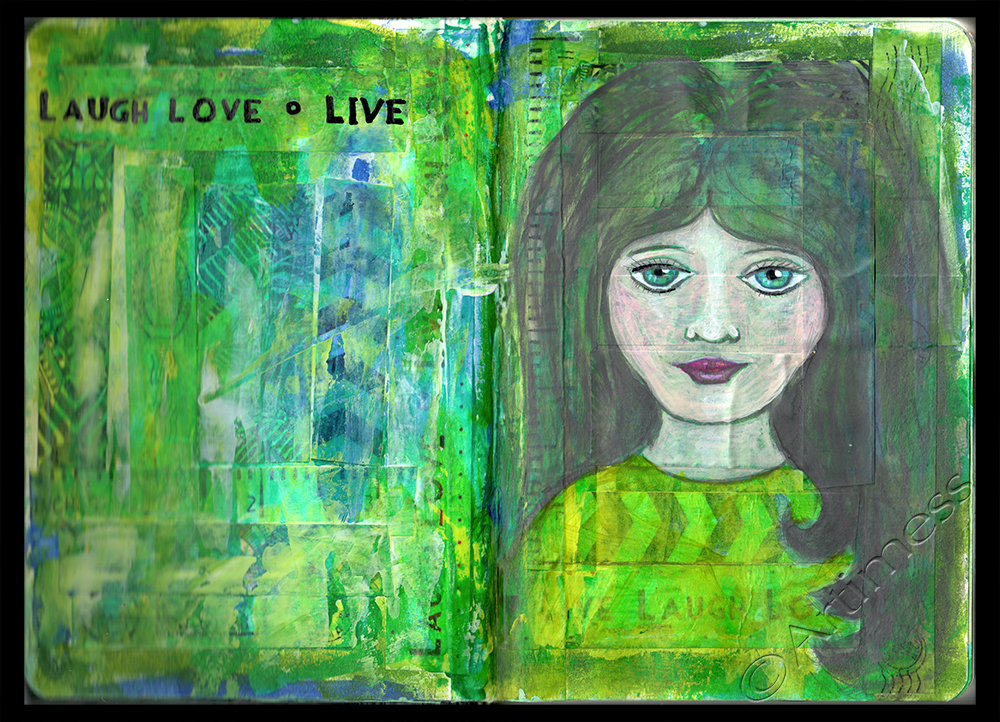
I started this next spread by covering the pages with washi tape, then used thin washes of acrylic paint to colour the page and create the ‘green girl’ on the right.
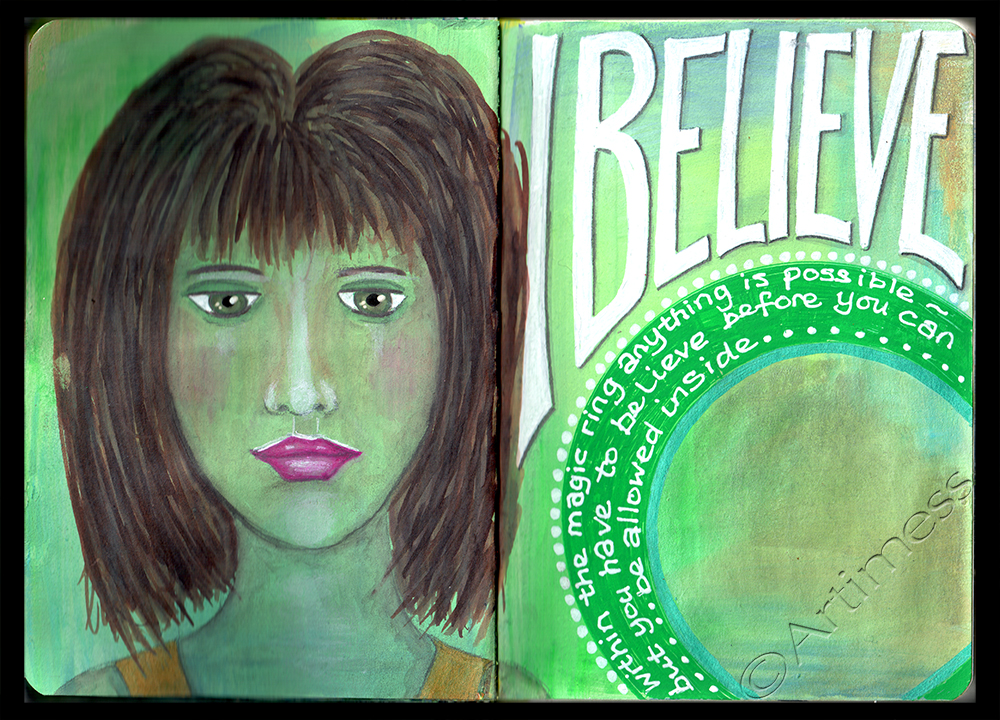
My ‘I Believe’ spread was inspired by Effy’s Book of Days spreecast about wonder. I really love how it turned out.

In this last spread I decided to play with some rediscovered hand made funky foam stamps that I made quite a few years ago. I had so much fun – I’m planning on making some more stamps to add to the collection!
I’ve almost finished making the postcards for the iHannah DIY Postcard swap so keep watching for some pictures of those once they’re done.
![]()
All Packed Up!
All Packed up and ready to go… in just over 12 hours we’ll have the keys to our new home – very exciting!

These two boxes contain essentials … my paints and brushes, recycled stamps, gel medium, stencils and many other goodies that I have been using for the last week or so. I feel as though part of me is missing at the moment! So to keep me out of mischief I’ve been playing image altering on my iPhone!

We were given this plant by a good friend just over a year ago, and it is still flowering and flourishing. I have no idea what it’s called, but I love the colour and the shape of the flowers. Can you put a name to it?
![]()
Sidetracked Again!
Ooops! – I got sidetracked again! But this Life Book lesson from Dawn DeVries Skol was just so much fun!

I started by painting the background using acrylic paint. I decided that I wanted the self-portrait to be transparent so I printed it on overhead projector film then cut it out and stuck it down using gel medium. It has left me with a slightly streaky face, but I like being able to see the background through the image. Next I added the journalling and doodling using Pitt Artist pens and coloured the large letters and doodles using neocolour crayons. Lastly I inked round the edges of the pages with a distress ink pad. Thank you Dawn for a really great lesson!
Now I really am going to get back to Dion Dior’s 21 Secrets Lesson!
![]()
Playing Games
I’ve been busy altering tins and making game cards for Diana Trout’s class on the 21 Secrets 2013 course.

I took two old cough lozenge tins, sanded them and primed them with gesso, then painted them with acrylic paint. It was not a success – the paint started to flake off! So I covered the paint with tissue paper glued on with gel medium. Success! I still wasn’t happy with the way they looked, so I added several more layers of acrylic paint in different colours and another layer of gel medium. Once I was happy with the tins I created their labels using a stamped flower and a digital label. I coloured both of these using Twinkling H2O’s. I made the game cards from double-sided scrapbooking paper, then used the same stamped flower and digital label for the instructions.
I found this class to be quite a challenge, but I’m glad I did it – I learned a lot. Thank you Diana.
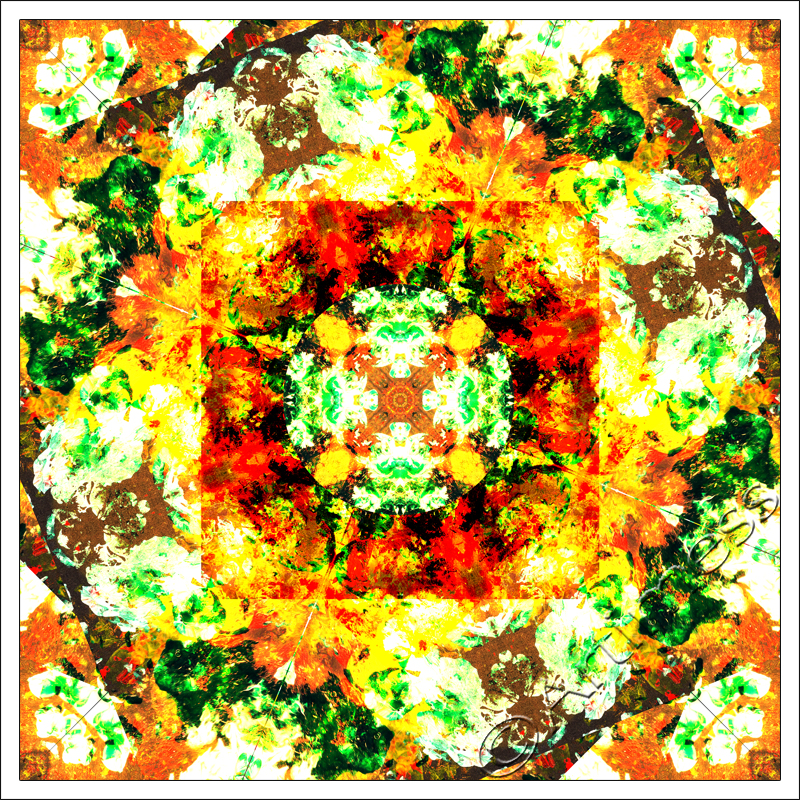
About a week ago I posted this blended image and said I didn’t think I was quite finished with it yet. This is why – I just turned it into a kaleidoscope! I love the colours and all the faces in the patterns. How many faces can you find? I keep losing count!
![]()
Mixed Media Fun!
Yeah! – at last, I got to play mixed media!! I had so much fun!
I finally got the courage this year and signed up for 21 Secrets 2013. As I have never really done any proper art journalling, I treated myself to a smart Strathmore Mixed Media Journal – it was a dream to use, and just the right size!
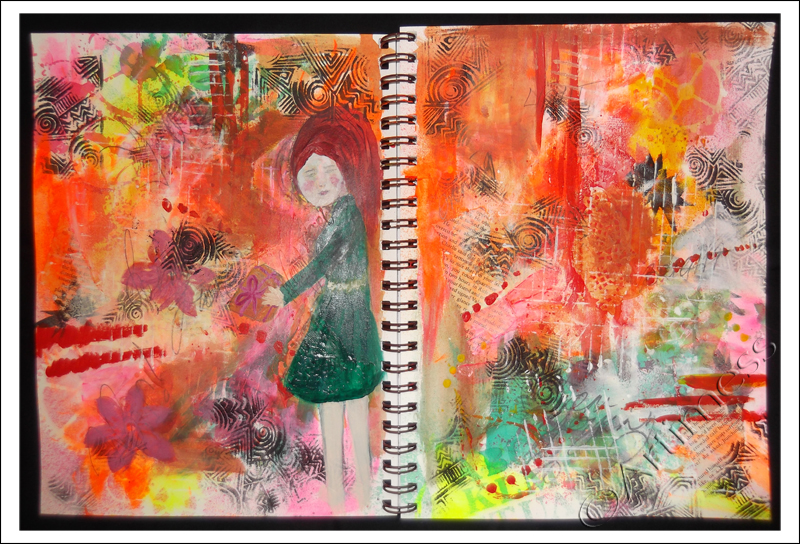
This is my play page, which I’ve titled ‘The Gift’, inspired by the class from Carissa Paige. I played with acrylic paint, ink sprays, stencils, foam stamps, staz-on ink pads, collage, and graphite pencils. I found the girl in green holding ‘The Gift’ lurking in the painty mix. Thank you Carissa for the gift of freedom you inspired with your class. I know I had fun – I’m still picking the paint and gel medium off my fingers!!
I made an interesting discovery when I tried to scan the finished picture – my scanner does not ‘see’ luminous acrylic paint, and as I used rather a lot, it left the colours looking a bit flat! So I spent ages trying to get a good photo which didn’t have too much reflection! Has anyone else discovered this problem?
Last but not least – I received my ninth postcard this morning all the way from Australia – a wonderful hand drawn mandala from Lulu – beautiful! Thank you so much. Only one more postcard to go – then it’s all over for this year – it’s been so much fun! I’ll have to hunt around for another swap to take part in. Anyone got any ideas?
Now I’m off to play mixed media in the next part of Carissa’s class!
Gratitude!
Still playing catch up with Life Book 2013 classes, today I finished this piece for Tam’s week 10 lesson.

I decided to add my own twist to the lesson by folding my paper in half and cutting a heart shape in the front half to make a heart door. After cutting the door, I started the background using acrylic paint, then added a collage of printed tissue paper, washi tape, and paper ribbon. Next I used Caran d’Ache neocolour crayons and stamping with a staz-on ink pad to add more colour, then finished the front using die cut letters. Once it was all dry, I taped in the ribbon ties and stuck the two halves together.

On the inside, I covered the back of the door with torn tissue paper and gel medium, then set to work making the mini scrolls for the centre from a mixture of torn magazine pages and digital design prints, decorating some of them with stamping. I filled the heart shape with gel medium, and arranged the scrolls on top. Lastly, I made the ‘Gratitude” banner by sticking some die cut letters on a scrap of digital design paper.
I had great fun with this lesson – thank you so much Tam!
![]()
Handmade Postcards
Last Sunday we travelled to Harrogate and visited the Great Northern Papercrafts Extravaganza – great fun! I got some really cool stencils, stamps and dies which I have been playing with this week.
On Monday I signed up to take part in the iHannah’s DIY Postcard Swap 2013. (There’s still time to sign up if you’re interested, you just have to pledge to post 10 handmade cards by 30th March.) So I have been busy this week making my ten cards for the swap.

I started by creating a set of coloured backgrounds using Inktense Watercolour pencils. Next I added a contrasting colour using Acrylic paint and an Artist Cellar Stencil followed by a stamped image from IndigoBlu using a mixture of distress ink and staz-on ink pads. I followed this with a layer of gel medium to seal everything and to stick on the word definition tags, which I created using more stamps from IndigoBlu and a Creative Expressions stencil, and the die cut letters from memory box. Lastly I added another layer using the same stencil with acrylic paint.

I created the backs of the postcards using a free postcard backside from iHannah which I had to resize to fit my postcards, then added a digital stamp which I made using a scan of another Creative Expressions stencil, some hand drawn bird shapes and a quotation from Friedrich Nietzsche.
The completed postcards are now sitting waiting for their recipients addresses to be added!
![]()
Being Brave!
I have managed to get behind with virtually all my self-imposed deadlines at the moment, so I have decided to be very brave, not to even try playing catch up, but just to do the things I feel drawn to! So… today I finished last Friday’s assignment from Carolyn Dube’s Use Your Words workshop. This is such a cool workshop!
The first part of the assignment was to create a background sheet for cutting up. I used homemade letter stencils, white gesso, an Artist Cellar letter stencil, and gel medium. After I scanned it, I cut it up into five pieces.

The second part was to create a journal page incorporating a collage made using a piece cut from the background sheet. My collage is made up of a hand cut tag painted with acrylic paint, the piece of background sheet, two scraps of material, some paper lace painted with acrylic paint, and a bird cut from foam and coloured using acrylic paint. The words were added using a uniball eye pen – which is supposed to be waterproof – but as you can plainly see, didn’t survive the background sprays without joining in the colour runs! (the sprays were ink and twinkling H2O’s). But I wasn’t too upset as I think the runs just add to the feeling of movement on the right hand page. What do you think?
![]()
New Blooms
Ever since Tam published this week’s Life Book 2013 Lesson from Christy Tomlinson, every spare minute I’ve had has been devoted to getting messy playing with the new techniques Christy taught us.

Along the way I had some leftover paint which I used with a flower stencil to create an image. I scanned this together with the sheet I prepared for making the flowers in the main project, then blended them. It’ll make a good background for something one day!

Finally – the finished product! I had so much fun! I started by creating a mixed media collage background using newspaper, old magazine inserts, bits of old envelopes, washi tape, white acrylic paint, inks, stamps and marker pen for the words. Then came the fun part of making the flowers. You’ll have to do the course if you want to know how, but I used kitchen roll, tissue paper, very runny acrylic paint, stencils, stamps, kitchen foil and lots of gel medium. I had to adapt some of the ingredients as I didn’t have everything on Christie’s list! It was great fun, and very messy! – Thank You, Christie!
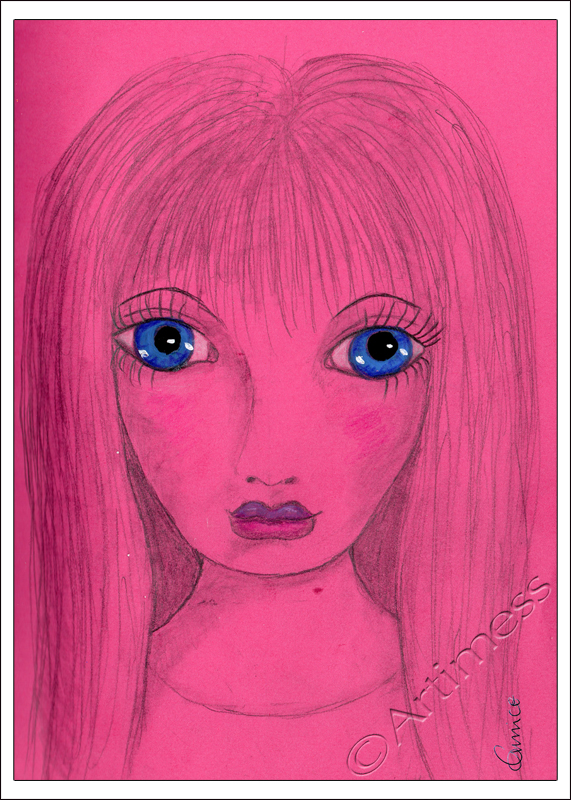
I’ve really been missing drawing this year, so today I drew the Pink Lady! I wasn’t going to colour her at all, but then I had an accident over her right eye with my white marker. So she now has blue eyes! Not a bad cover up job!
![]()
Foam Embossing
Still playing catch up with Life Book 2012, Jodi Ohl showed us how to make these embossed foam embellishments – really cool!

They really are very simple and cheap to make and can be made into simple embellishments, buttons or anything else you can dream up! Heat up the foam with a heat gun and then press a rubber stamp into it to emboss the pattern. You need to press very hard, and the foam is quite hot so I don’t think it will work with clear stamps (they don’t like heat, and tend to go all squadgy if you press too hard). If you don’t like the result just heat and try again. When you are happy with the result you can colour them any way you want. I used a mixture of acrylic paint, perfect pearls and gel medium to give a nice glossy finish and seal them.
Like the backgrounds, I’m not sure what I’m gong to use them for yet … but keep watching … they’ll turn up on something soon!
![]()