


Finished Page!
At last all the layers have dried and it’s safe to scan the finished page.
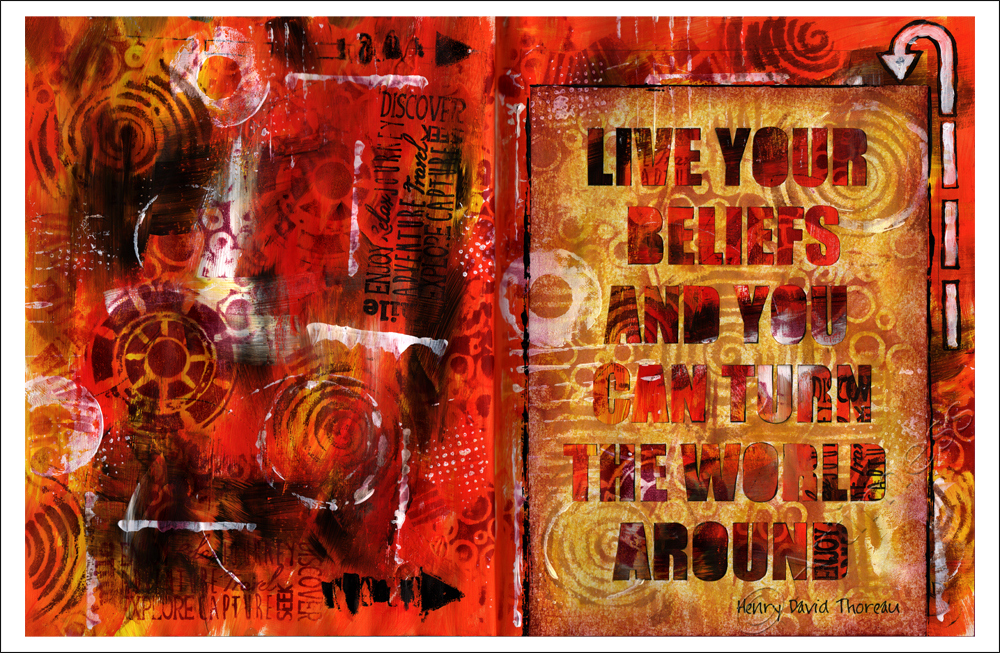
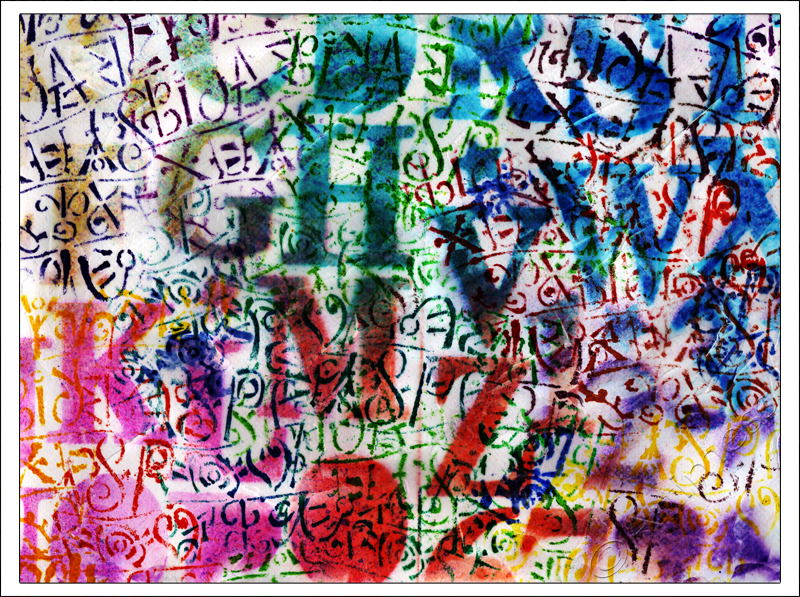
I love how the finished page turned out, and I had such fun making it. The only tricky part was managing the wet media on the thin pages of my new journal, but I managed that by starting with a thickish layer of white gesso and using the acrylic paint with a dry brush. What I love is that you can still see some of the original pages through the layers in places!
Just for a change my ‘ingredients’ list is quite short! I started with white gesso, added layers of acrylic paint, and stamped using various clear and homemade stamps with a staz-on ink pad and some distress ink pads. I printed the quotation onto plain white copy paper then cut out the letters by hand, leaving me with a stencil affect. I coloured this using distress ink pads, then stuck it to the page using a glue stick. Lastly I added some more acrylic paint using an assortment of household items!
![]()
Blogalong with Effy!
I’ve not been blogging very regularly of late, so when I got effy’s newsletter today and saw that she was hosting a blogalong during August, I thought it would be a good idea to sign up in an attempt to complete thirty posts in thirty days!
Meanwhile, I’ve been back to playing catch up with the Life Book 2013 lessons. I started with Danita’s great class entitled Key to Freedom. The class started with a link to this cool podcast from Tarah Brach
The theme of the lesson corresponded exactly with the July Rumi Project quote over at the Glitterhood, so I had to incorporate it!
“Why do you stay in prison,when the door is so wide open?”

I started out by drawing the girl and the cage in pencil, then painted them using masking fluid before journalling on the background using a white gellyroll pen. I then painted over everything using Twinkling H2O’s. When everything was dry, I peeled off the masking fluid, coloured the girl using neocolour crayons and painted the cage with Twinkling H2O’s. Lastly I wrote the Rumi quote using a white Uni Paint Marker.
This week’s class was from Dina Wakley.
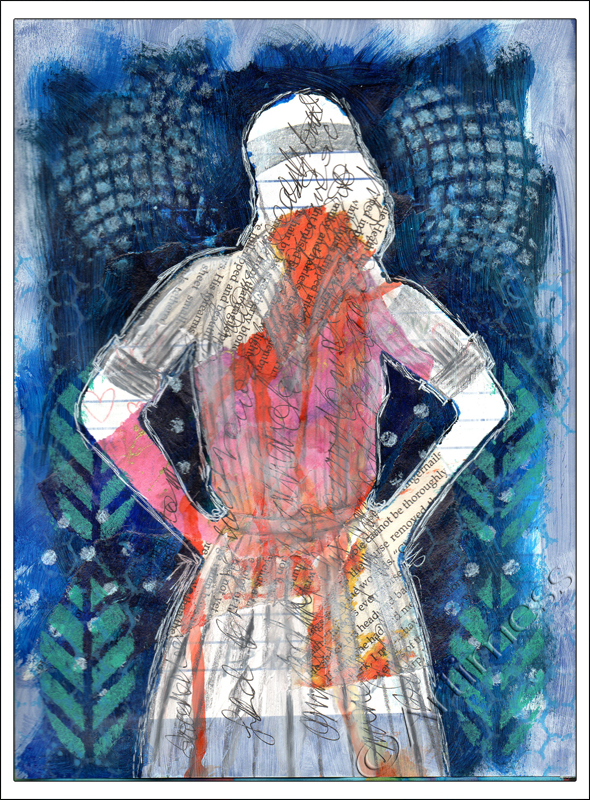
I started the page with a coat of white gesso then added some collaged book pages and old scanned artwork. Next I dripped some ink down the centre of the page and journalled across it, then placed a silhouette mask I created over the top and used acrylic paint to cover most of the page around the mask. I used stencils to add some interest to the background, and lastly, added some detail to the silhouette using a Stabilo All pencil and white acrylic paint. I found creating this page very therapeutic – thank you Dina.
![]()
Playing with Ink!
Project #4 in Kate Crane’s 21 Secrets 2013 class is all about playing with ink! I managed to make quite a mess and had wonderfully coloured fingers for a day!

I started off with a piece of recycled cardboard and covered it with a patchwork of torn music squares then covered that with white gesso. Next came the messy part – spraying ink. It took several layers to achieve the look I was after and Kate showed us a really cool technique which disappointingly didn’t work with my homemade ink sprays. Still I was pleased with the result I got. For the next layer I used an assortment of background stamps with colour co-ordinated distress ink pads. I have yet to add acrylic inks to my supplies, so I thought I’d have a go at making my own using golden fluid acrylics and water. It took a bit of juggling, but I managed to get quite a pleasing result which I used in a dropper to draw circles on top of the stamping. For the final layer I used Pitt Artist pens and an alphabet stencil to create my caption, and collaged a quotation from Carl Jung that I printed on my computer.
Just two more to go now!
![]()
Transitions and Changes
Project #3 in Kate Crane’s 21 Secrets 2013 class called for us to draw three people representations and journal on their bodies. Just prior to watching Kate’s video, I had been reading these articles by William Bridges about transition and change: their meanings, the differences between them and their relationship to each other. While William Bridges is writing about these terms in relation to the work environment, I was thinking of them in a personal environment, and thought it would be interesting to use project #3 to journal about these ongoing experiences in my life. As a result I ended up with five figures!
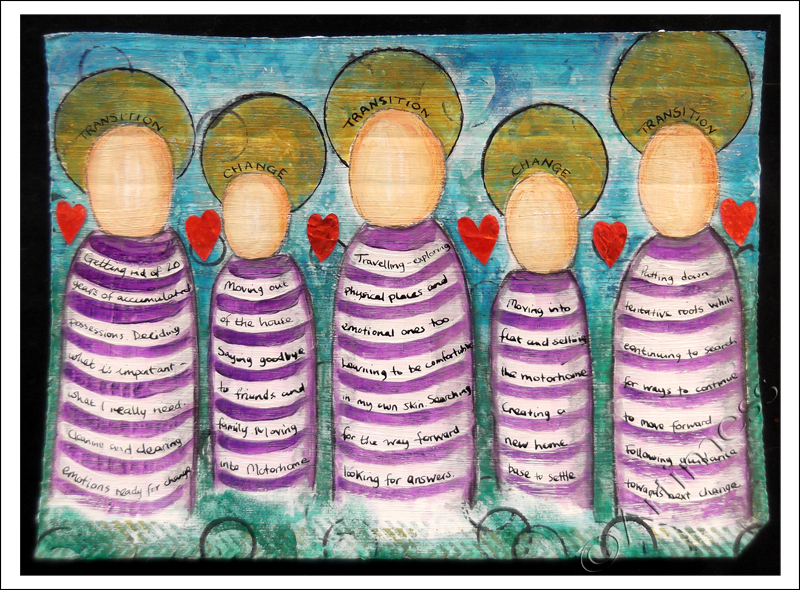
As before, I started off with a piece of recycled cardboard, but this time I began with two layers of white gesso. Next I positioned and lightly sketched my people, then painted the remaining background using acrylic paint and a variety of stencils, stamps and stamping junk (old bottle tops etc). I used more acrylic paint to paint my people, then added more depth to the colour using neocolour crayons. I added the journalling using a dip pen and black indian ink and finished the piece off with six hearts cut from leftover scraps from a previous project.
Three done, three more to go. Keep watching this space!
![]()
Being Brave!
I have managed to get behind with virtually all my self-imposed deadlines at the moment, so I have decided to be very brave, not to even try playing catch up, but just to do the things I feel drawn to! So… today I finished last Friday’s assignment from Carolyn Dube’s Use Your Words workshop. This is such a cool workshop!
The first part of the assignment was to create a background sheet for cutting up. I used homemade letter stencils, white gesso, an Artist Cellar letter stencil, and gel medium. After I scanned it, I cut it up into five pieces.

The second part was to create a journal page incorporating a collage made using a piece cut from the background sheet. My collage is made up of a hand cut tag painted with acrylic paint, the piece of background sheet, two scraps of material, some paper lace painted with acrylic paint, and a bird cut from foam and coloured using acrylic paint. The words were added using a uniball eye pen – which is supposed to be waterproof – but as you can plainly see, didn’t survive the background sprays without joining in the colour runs! (the sprays were ink and twinkling H2O’s). But I wasn’t too upset as I think the runs just add to the feeling of movement on the right hand page. What do you think?
![]()
Celebration Journey!
I have finally finished part two of Life Book Week 1! I had so much fun creating this – thank you Tam for such a great lesson! I chose an aeroplane as my mode of travel as I have have only just got my passport and have never yet flown. I intend to take my first flight in 2013!

I created my background using watercolour paint and rock salt, then added a collage of the plane, which I coloured using neocolour crayons, combined with a picture of me. I created the flowers using circles punched from old magazines then added the details using a uniball eye pen and watercolour pencils. Having already stuck the plane to the page, I then decided I wanted some buildings behind it! Nothing like planning for getting things in the right order! I photocopied a book drew the buildings using the uniball eye pen, then coloured them using watercolour pencils. Then I had to cut them to fit round the plane! Next came the clouds, using the uniball pen and white gesso, and the sun using the uniball pen, yellow acrylic and neocolour crayons. Lastly I added the text digitally after scanning.
Phew! All done just in time to start Week 2. Roll it on!
![]()
Monochromatic!
I got a bit behind with the Life Book 2012 classes and have only just finished Rhomany’s monochromatic lesson from last week.

One of the disadvantages to having given away most of my craft supplies at the end of last year (read more about that here) is that I don’t have a lot of the supplies that Rhomany used, but I’m very good at improvisation!!
I started off with a collage of newspaper pages then drew the face using a black biro. I didn’t have any ink so I used a mixture of graphite pencils and neocolour crayons to colour and define the face. I used a tiny bit of white gesso for the highlights.
On the left hand side of the page Rhomany used black and white scrapbook paper. As I didn’t have any of that I used layers of black and white tissue paper to create my pattern. Then I used white gesso to create a lighter area on which to add my words which I created using my dymo machine, black paper and a white oil pastel.
Lastly I added some stamping using a Staz-on ink pad.
![]()
Moving Forward
Today I played catch up with my Life book 2012 classes. I completed Lesson 29 from Jodi Ohl. The lesson started with a positive letter to my younger self which I then tore up and used as the basis for the piece. For the next layer I added some printed tissue paper followed by a thin wash of white gesso. Then I stamped a border using home-made foam stamps and acrylic paint – messy!

When it was all dry I drew the face using pencil and coloured it using a mixture of acrylic paint, gesso, Inktense pencils, uniball pen and pencil. Finally I added a set of positive affirmations around the edge.
I had so much fun making this and found the personal development element very useful – thank you Jodi!
![]()
Take Two…
Take two images – in this case two leaf prints. Scan into the computer, then work some digital blending magic ….

…. et voila! – one new piece of art.

Both images have acrylic paint leaf prints on a background. The top background was coloured using neocolour crayons, the bottom background was painted with white gesso.
![]()
Celebrating!
I really enjoyed this weeks Life Book lesson with Samantha Kira Harding. Each layer had its own special meaning and took courage to cover and move on. But I’m so glad I did – the finished piece has so much depth.
 - Life Book 2012, Week 42")
This is the first scan taken after the first three layers. Layer one was journalling done using Derwent inktense pencils. This was followed by a layer of white Gesso which made all the journalling colours run and blend together creating a lovely soft background colour. Layer three was a mixture of alcohol inks shaken from the bottles to create nice ink splodges which I swooshed around with a tissue to spread the colour further, and a lino cut which I stamped over the top using distress inks.
 - Life Book 2012, Week 42")
This next scan – done on my lovely new A3 scanner – was taken after the next two layers. It took a while for me to pluck up the courage to add a layer of Gesso to everything and even more courage to start doodling over the top of it, but I’m glad I took the plunge! The doodling on the right page was done using graphite pencil and neocolour crayons followed by a flower collage and face outline drawn in pencil.The left page got a collage of tissue paper.
 - Life Book 2012, Week 42")
The final scan shows the finished piece. The face on the right page was painted using neocolour crayons. The left page had a machine stitched border added and journalling done with a gel pen. It took a few days to complete, but I’m really pleased with the end result. Thank you so much Samantha!
![]()