Celebrating!
I really enjoyed this weeks Life Book lesson with Samantha Kira Harding. Each layer had its own special meaning and took courage to cover and move on. But I’m so glad I did – the finished piece has so much depth.
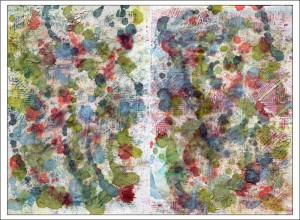
This is the first scan taken after the first three layers. Layer one was journalling done using Derwent inktense pencils. This was followed by a layer of white Gesso which made all the journalling colours run and blend together creating a lovely soft background colour. Layer three was a mixture of alcohol inks shaken from the bottles to create nice ink splodges which I swooshed around with a tissue to spread the colour further, and a lino cut which I stamped over the top using distress inks.
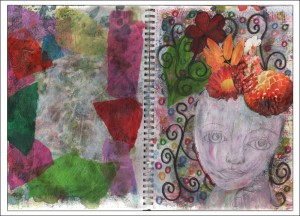
This next scan – done on my lovely new A3 scanner – was taken after the next two layers. It took a while for me to pluck up the courage to add a layer of Gesso to everything and even more courage to start doodling over the top of it, but I’m glad I took the plunge! The doodling on the right page was done using graphite pencil and neocolour crayons followed by a flower collage and face outline drawn in pencil.The left page got a collage of tissue paper.
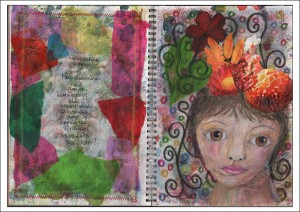
The final scan shows the finished piece. The face on the right page was painted using neocolour crayons. The left page had a machine stitched border added and journalling done with a gel pen. It took a few days to complete, but I’m really pleased with the end result. Thank you so much Samantha!
![]()
Collage Lady
Being without any internet for the past few days, I have had more time to get messy with paint and gel medium! Collage Lady is another catch up from the Life Book Course.
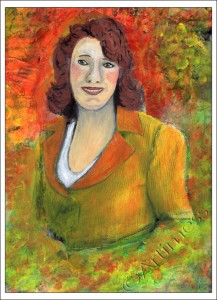
Loosely following Mystele’s week 22 lesson I created a collage from torn magazine pages using a picture of a woman as the central focus. I then used a mixture of pastels, gel medium, neocolour crayons, journaling and acrylic paint to add colour and depth to the work. I must add that the painted lady bears virtually no resemblance to the collaged image underneath!
I had great fun making this piece. Thanks for the lesson Mystele and for the new techniques I learnt!
Spiritual Growth
Last weeks life book lesson with Tam was to create a mixed media collage using paper and material celebrating where you are now using no more than two words. I love working with material, so I just had to have a go at this lesson! I chose Spiritual Growth for my two words as above everything else, that represents where I am right now.
I started off with a collage of images torn from magazines. Then I added an assortment of material pieces most of which were more or less transparent so they just added colour while still allowing the paper layer to show through. Next I added the images and words which I printed out using my computer. I used a distress ink pad to help the paper to blend in with everything else. I added some hand stitched crosses and buttons and finished off with some machine stitching to link everything together.
I’m quite pleased with the way it turned out. Its very tactile – I love the feel of all the stitching! Thank you Tam for another great lesson.
Newspaper Collage
Newspaper is one of my favourite materials – it is so versatile! You can use it to protect your work areas, you can cut it up and make things with it, you can build things with it, you can use it for papier mache, you can take prints from it, you can use it in collages – and those are just a few of its craft uses!
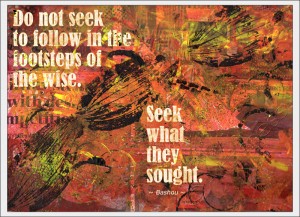
To create this image I completely covered a sheet of watercolour paper with torn newspaper, then added acrylic paint using a variety of implements including bottle lids, bubble wrap, sequin waste and old credit cards. Next I added some carefully chosen, strategically placed leaf prints and a few stencilled footprints. Finally after scanning the image into the computer, I added a quotation using distressed digital text.
I love the way the newspaper peeps through the layers in places!
Ironing My Images
No … I’ve not gone completely mad … I really have been ironing my images! I’ve been trying out another technique from the Image Transfer Workshop Book. By some magical process (the physicists out there will be able to explain exactly how it happens) heating a magazine page that is next to some cling film (plastic wrap) enables the two to bond. You can then remove most of the paper backing which leaves you with a new very thin, waterproof version of the image. Clever stuff!! This is my first attempt … and I’ve stuck it in my altered fiction book before adding paint to the page.

Cling Film Transfer
I’ve been busy completing more pages in my Wreck this Journal as well. This page was done using the Gel Medium method described in my last post. I used last week’s church bulletin (which was printed using an ink jet printer). I love the distressed look this method gives to the transfers!
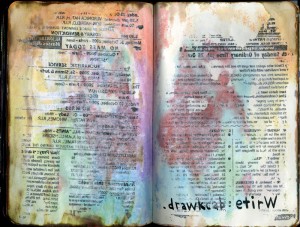
Write Backwards - Ink Jet / Gel Medium Transfer
I’ve been struggling over what to do with this next page for some time. The page was headed “Space for Negative Comments” – not something I thought was very constructive! But then I thought … what if I wrote my negative thoughts in thin black pen and wrote their opposite on top in thick red pen – it would be following the instructions, but putting a positive spin on it. So that’s what I did! Next I painted the opposite page and squidged them together to transfer some of the wet paint. That obscured some of the words, but it was still too legible for for my liking, so I added a blur filter to the right hand page after I scanned it!
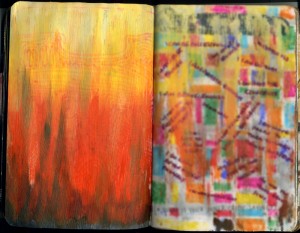
Space for Negative Comments
… sorry … you don’t get to read my secrets … but I like the way it looks 🙂
Green Thumb …
Green Thumb
It all started last week when I taught leaf printing at one of my craft classes. I get so much inspiration from teaching! … I came away from that class inspired to find as many ways as possible of using leaves.
A few weeks ago I came across several cans of spray paint left over from previous projects … so I decided to try using them with the leaves, and the ‘Sample Various Substances’ page seemed the perfect page in the journal to use for the experiment.
After I’d picked a selection of leaves I used them as both masks and stamps to achieve this effect.
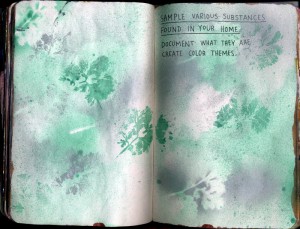
Sample Various Substances ...
Using leaves for printing, you end up with some beautiful colourful leaves. I took a couple of the ones I brought home from the class, covered them in Gel Medium and used them to create this picture.
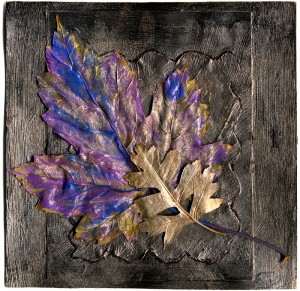
Leaf Printing Leftovers!
Going back to my journal, I decided to do something with the ‘Document Your Dinner’ page. I wasn’t prepared to feed my dinner to it, so I did the next best thing and used a heap of favourite ingredients to splatter over the page. I used Soy Sauce, Spaghetti Sauce, Strawberry Sauce, Lemon Juice and Salt!
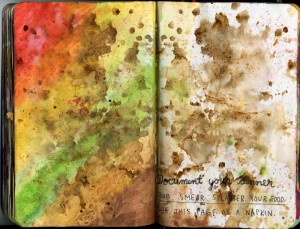
Document Your Dinner!
I’m quite pleased with the visual effect … and it’s added yet more interesting aromas to the journal – it really is a multi-sensory experience!!
Let’s Have Some More Creativity!!
Yes!! … I’ve done it! I’ve linked and transferred all the posts, images and comments from my free WP blog! I couldn’t believe how simple it was 🙂 Any way … enough of my rambling …. let’s have some more creativity!!
Last week, my daughter left home to start her life at Greenwich University. I decided a ‘Welcome to Your New Home’ card was a bit too normal, so to mark the occasion, I made her a Mixed Media Collage picture for her wall.
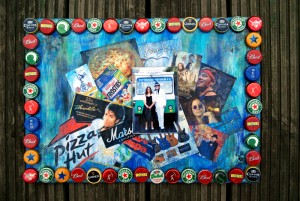
New Home Present
I started off with an old piece of mount board left over from my own days at Uni not that long ago. I painted it with white gesso to give me a good base to work on then coloured it using a three or four colours of acrylic paint and various techniques. My next step was to arrange the images into an interesting shape which I then covered with more acrylic paint to make them blend in. I mounted the central image onto some corrugated board and stuck it in the middle, then made the frame from old bottle tops.
Delivering the picture, along with a car load of ‘forgotten’ bits, at the weekend gave me the opportunity to take my camera out round the O2 on Saturday night. With my normal penchant for the unusual .. I was quite pleased with these detail shots taken inside the dome.

O2 Ceiling Support - 1
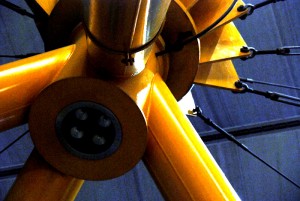
O2 Ceiling Support - 2
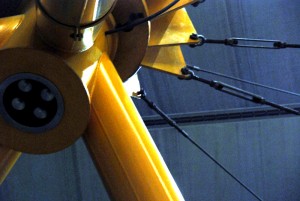
O2 Ceiling Support - 3
I love getting out with my camera – it provides me with a wealth of original images that I can turn into artwork for all kinds of uses.
Jigsaw Pieces, Thick and Thin Lines, Gesso and Gel Medium
Jigsaw pieces, thick and thin lines, gesso and gel medium …
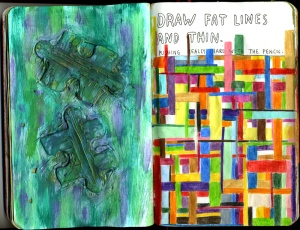
Draw Fat Lines and Thin
I had great fun drawing the thick and thin lines with my water colour pencils. I’m still considering giving it a wash to soften and blend it … but I can’t make up my mind … so I’m leaving it for now!
The jigsaw pieces weren’t meant to stick to the page!! I was trying to make a raised jigsaw outline, but I used a bit too much gesso and when I came to remove the pieces… they were stuck solid!! So I turned them into a collage instead and added some thick gel medium to create some great textured ridges in the pieces!
After I scanned the image of these pages into the computer, I created an A4 print of the coloured lines pages and printed it out.
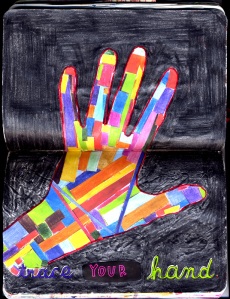
Trace Your Hand
I used this to cut up and make a sort of collage/mosaic fill for my traced hand. I coloured the background using a black water colour pencil.
I’m having so much fun with this journal and learning so many new techniques; but most importantly i am learning to be more experimental in my creativity.
More Inspiration from Kelly Rae Roberts
I started reading Kelly Rae’s book nearly two months ago and have been meaning to have a go at making the art journal in chapter one for ages. I finally made a start this weekend! I started by making the fabric tags for the spine.

Painted Material Collage
I’ve been using wonderweb and iron on interfacing to create material collages for some time now, but I had never thought to paint on top of it! You need the clear gesso as a base, but once that’s added – it really is like painting on paper.

Collage made into tags
The letters were added using a black Sharpie and a white Sakura Souffle pen. The eyelets were added using a Cropodile Big Bite. I really love this process and the way the tags feel!
Next I made a start on the front cover of the Journal. I was a bit nervous about adding a person, and wasn’t sure which media would be best to use as I don’t have any oil paints …. but in the end I plucked up my courage and just used my acrylic paints.
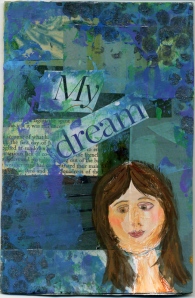
My Dream - Mixed Media Art Journal - Front Cover
Considering it’s my first attempt at anything like this – I’m quite pleased with the result 🙂
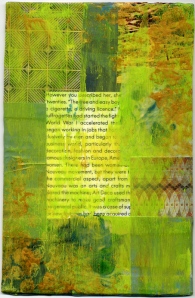
My Dream - Mixed Media Collage - 1st page
This is the inside of the front cover all ready to be written on!
All This Book Altering and Journal Wrecking …
All this book altering and Journal wrecking is having a profound and very freeing effect on my artistic endeavours. I’ve started this experimental journal …. and the first thing I did was cut a hole in the cover!!

Journal Cover
The title I made from recycled magazine images and the flower from an old newspaper. The inside of the cover I created from an old book page crumpled and inked with alcohol inks.
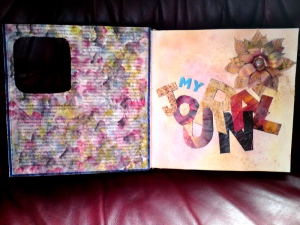
My Journal Title Page
The next page, Learning Curves, I cut the title from a magazine article. The facing page has a torn magazine image and some crumpled inked paper together with an aperture cut to accomodate the butterfly image which I stamped on the waste I cut from the cover of the Journal. [this is recessed within 4 pages]

Learning Curves Page
On the next page I have used a complete newspaper page cut down to fit, then I coloured it with water colour pencils. I gave it a wash with water and shut the book to transfer some of the colour to the facing page.
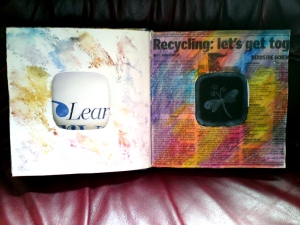
Recycling Page
Although it wasn’t planned, I seem to be documenting my work in this journal … it will be interesting to see how it develops!


