


Getting Messy!
Today I’ve been working on Danielle Daniel’s class, part of the 21 Secrets 2013 course. I had great fun and got very messy creating this background.
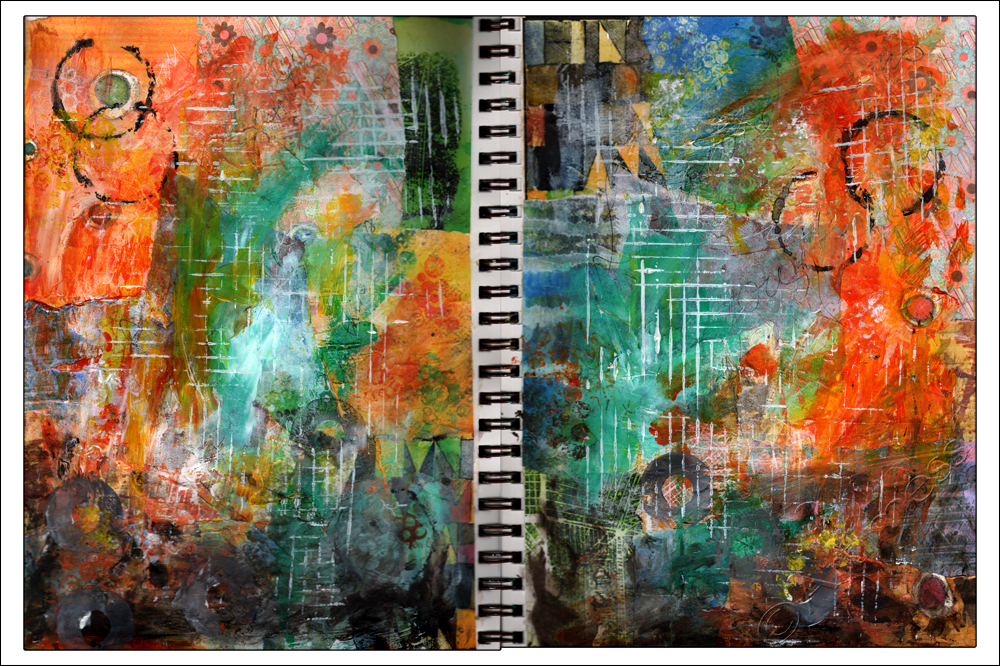
I started out with a collage of printed papers from my earlier artwork, then added acrylic paint using a variety of techniques. Next I added journalling followed by more acrylic paint! I still have more to do to finish – there’s at least one person waiting to be painted – but I really like how it looks right now, so I thought I’d share it with you.
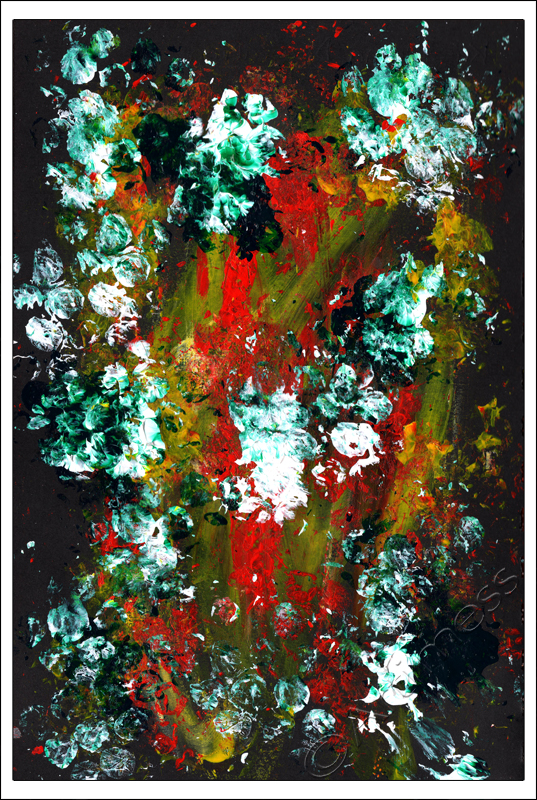
When I finished painting, I had rather a lot of leftover paint on my palette, so I created this in my notebook.

Then I decided to see what it looked like with a bit of digital blending. I quite like how it turned out so far, but I have a feeling I’m not finished with it yet!
![]()
Bloom Like Flowers
“The most precious gift we can offer others is our presence. When mindfulness embraces those we love, they will bloom like flowers.”
I thought this quotation from Thich Nhat Hanh was very appropriate for my journal spread inspired by Cathy Bluteau’s class on the 21 Secrets 2013 course.

Why is it that whenever you want a specific sort of image in a magazine you can never find what you want? I ended up sourcing my flowers online from Five5Cats who very kindly allows her images to be used for private artwork. Thank you Cindy!
I collaged the background using old papers and flowers, then added doodling using Pitt Artist Pens. I coloured my doodles using Inktense pencils and filled in with more collage using various tapes and pieces of old artwork. I created the quotation using digital text and finished off by adding details with Pitt pens, an Edding 780 paint marker, neocolour crayons and distress ink pads.
I’ve never done anything quite like this before, but I really enjoyed it and will definitely do some more pages using these techniques. Thank you Cathy for a great class!
![]()
Gratitude!
Still playing catch up with Life Book 2013 classes, today I finished this piece for Tam’s week 10 lesson.

I decided to add my own twist to the lesson by folding my paper in half and cutting a heart shape in the front half to make a heart door. After cutting the door, I started the background using acrylic paint, then added a collage of printed tissue paper, washi tape, and paper ribbon. Next I used Caran d’Ache neocolour crayons and stamping with a staz-on ink pad to add more colour, then finished the front using die cut letters. Once it was all dry, I taped in the ribbon ties and stuck the two halves together.

On the inside, I covered the back of the door with torn tissue paper and gel medium, then set to work making the mini scrolls for the centre from a mixture of torn magazine pages and digital design prints, decorating some of them with stamping. I filled the heart shape with gel medium, and arranged the scrolls on top. Lastly, I made the ‘Gratitude” banner by sticking some die cut letters on a scrap of digital design paper.
I had great fun with this lesson – thank you so much Tam!
![]()
Mystery Muse
Now that February is over and my Mystery Musee has safely received her gifts, I can show you what I’ve been up to! I took part in the Artella Mystery Muse 2013 Project; you submit your details and a word which sums up the year for you and get given in return a “Mystery Musee” person to send two hand made gifts to in the month of February. I had great fun making gifts for my “Mystery Musee”.

The first gift I sent was this collaged playing card with her word for the year on the back enclosed in the altered envelope.
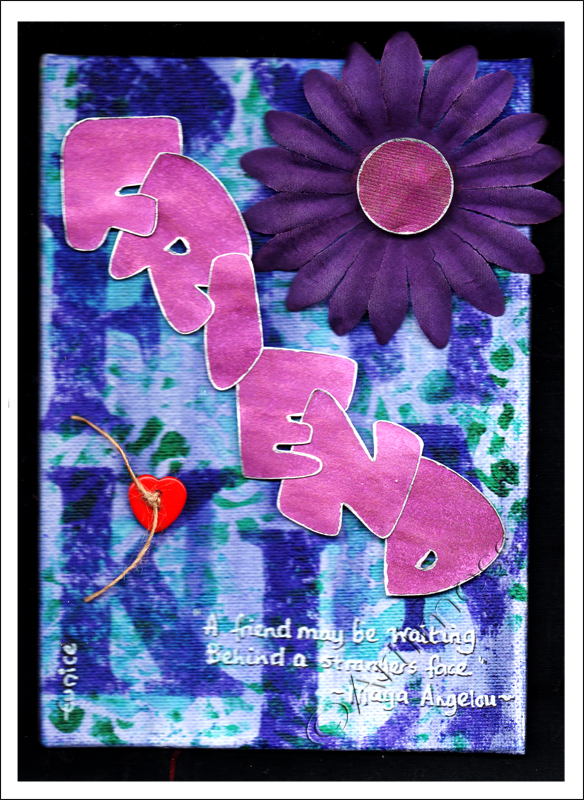
For her second gift I made this canvas board collage using letter stencils and a quotation from Maya Angelou.
In return, I received 2 beautiful gifts from a different person who had been given my details. It was so lovely to receive surprise ‘snail mail’ and inspirational to see another persons work in this way. I will definitely be signing up for this challenge again next year, and will be looking out for other hand made/artwork exchanges during the rest of the year. Do you know of any?
![]()
60 Goals!
I just read this post from Samie (Journal Girl) and (having just passed a major milestone) was inspired to create a similar piece for myself. Only trouble is – I have more than double the goals to create. But I did it!!
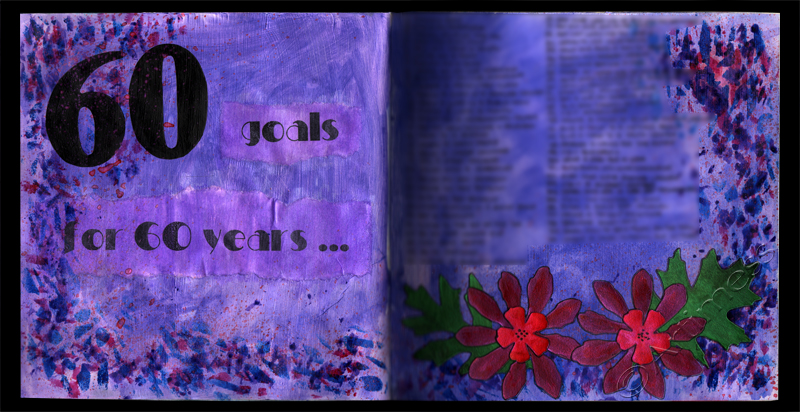
I had great fun! I started off with a gesso base, then added a wash of acrylic colour. I created the text using a mixture of Stencils with acrylic paint and computer generated text washed with Twinkling H2O’s. Next came a border using stencils and Twinkling H2O’s. I added my 60 goals using a Unipin fine line pen. Lastly, I splattered a bit more colour with some paintbrush flicking and collaged some die cut flowers and leaves coloured with Twinkling H2O’s.
I’ve blurred out my goals for now, but will reveal them in a years time when I review them to see how many I’ve achieved!
![]()
Colour!
I’ve been having fun with Carolyn Dube’s Use Your Words workshop again. This is Mondays project.
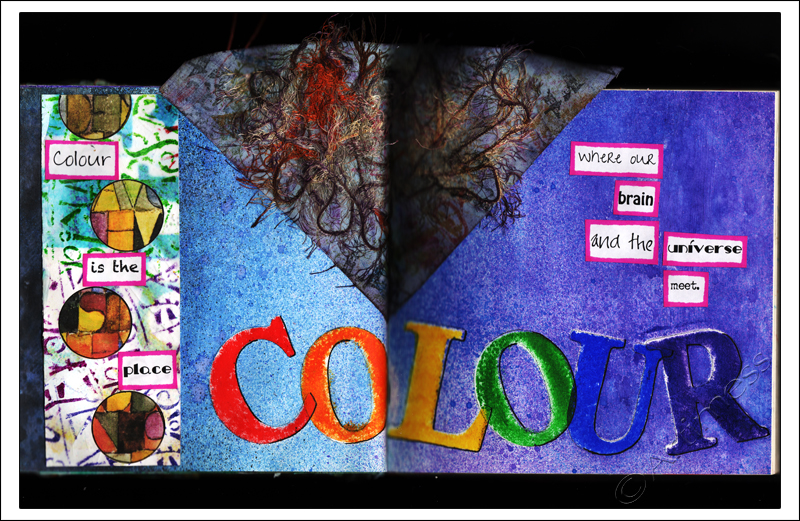
I started off creating the word ‘colour’ using my homemade stencil and acrylic paint, then masked the letters while I created the background using spray inks. Next I took a piece of yesterday’s background sheet with circles punched out of it and added a computer generated image behind to add depth. I created my quotation on the computer and cut up the words. I added shadows and outlines using a uniball eye pen and a sharpie marker.
Lastly I added a material and thread piece with has been sitting in my cupboard waiting for a new home for about three years (how’s that for using up odd bits!). It’s a bit bigger than the page, but I quite like how it sticks up at the top! What do you think?
Faces and Letters!
Today I have been getting really messy! In addition to creating my face for 29 faces, I’ve been playing with letter stencils.

I created today’s face using pencil, watercolour pencils and acrylic paint. She still doesn’t look entirely like the one I was copying, but I’m getting better!
I signed up for this free workshop, Use Your Words, from Carolyn Dube the other day and have been having fun playing with letter stencils for the first lesson.
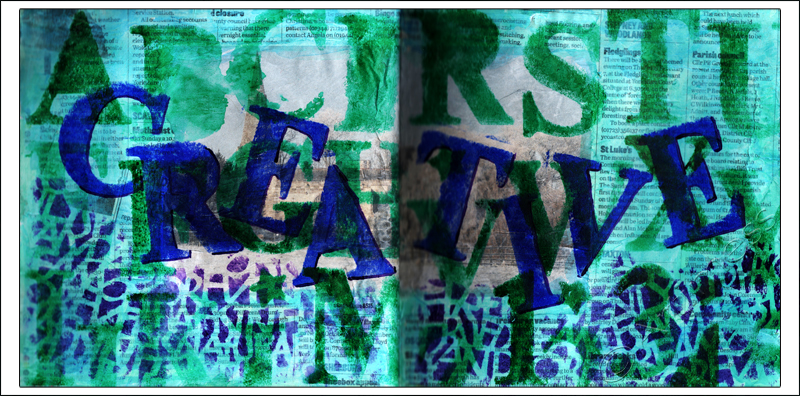
I started off with a collage of torn newspaper which I covered with a few layers of acrylic paint. Then I started playing with stencils! As I didn’t have the letter stencils Carolyn recommended, I made my own by removing a set of chipboard letters from their holding sheet, then using the sheet as a stencil. I used the whole alphabet and numbers to create the first layer, then made the word ‘creative’ over the top in a darker colour. I finished off using an Artist Cellar stencil to create a bit of interest at the bottom of the page.
I quite like how it looks right now, but I have a feeling I may be adding some more to it later!
![]()
Finally finished!
Yes! – I have finally finished my game board for last weeks Life Book lesson from Kelly Hoernig.
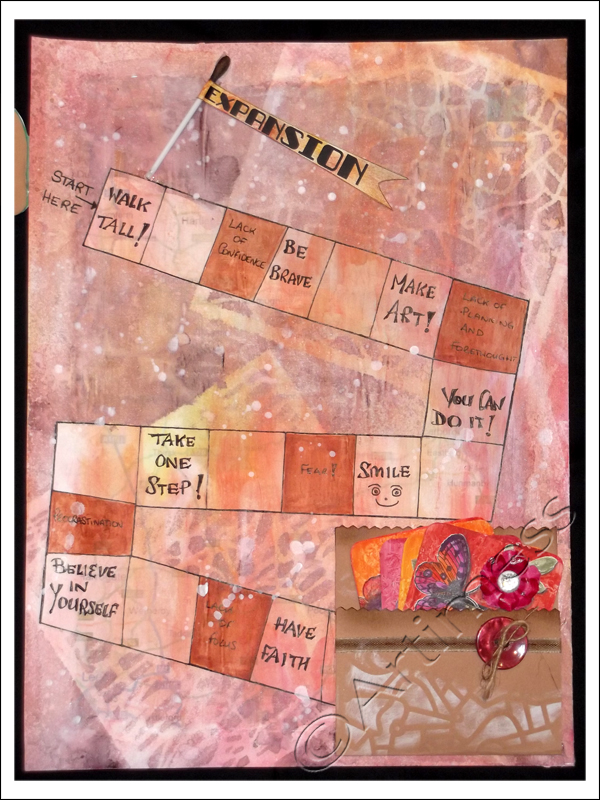
I ran out of space on my board to glue my car, so I attached it to a hinge so that it could be flipped to see the board underneath.

I may add some flowers to the roadside later – I can’t decide at the moment!
Meanwhile the ingredients list! I used collage, white gesso, acrylic paint, Artist Cellar stencils, a home made mask, some ribbon, a button, a little jute, a uniball eye pen, some digital text, most of a cotton bud, plus some ink and hot glue.
I really enjoyed making this – thank you Kelly for a great lesson.
![]()
Time Flies!
Doesn’t the time just fly by! I can’t believe it’s a week since I last posted here. In between a very special birthday, the celebration of which got delayed by snow over the entire country, followed by a nasty tummy bug which laid me out for a day, I’m only just catching up with myself now!

It all began when I had some leftover paint from creating cards for this week’s Life Book lesson. As usual I painted a page in my notebook with what was left of the paint. Then the postman brought me some very special paint that I’ve been coveting for a very long time – some Golden fluid acrylic paint! Well – I just had to try that out didn’t I? Isn’t it lush!

With two pages of abstract paint marks scanned I just had to play digital! So much fun and such beautiful colours!
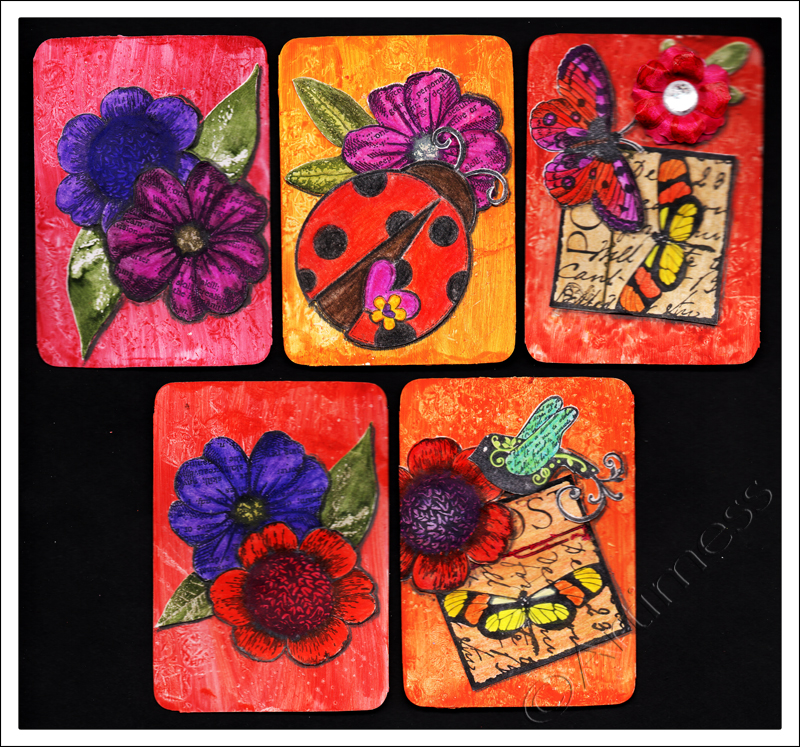
Today I finally finished my game cards, the first part of Kelly Hoernig’s Lesson from Life Book this week.

I created my own playing card size cards using glossy white card, then painted them using acrylic paint (the old paint!). I used collages of stamped images coloured using watercolour pencils to decorate the front of the cards, and luggage tags coloured using distress ink pads to write my goals on the back. I obscured the titles of a couple of them as I am not ready to share them at the moment.
So now I’d better get back to completing the rest of Kelly’s Lesson! I hope to be able to post it in the next day or so.
![]()
New Blooms
Ever since Tam published this week’s Life Book 2013 Lesson from Christy Tomlinson, every spare minute I’ve had has been devoted to getting messy playing with the new techniques Christy taught us.

Along the way I had some leftover paint which I used with a flower stencil to create an image. I scanned this together with the sheet I prepared for making the flowers in the main project, then blended them. It’ll make a good background for something one day!

Finally – the finished product! I had so much fun! I started by creating a mixed media collage background using newspaper, old magazine inserts, bits of old envelopes, washi tape, white acrylic paint, inks, stamps and marker pen for the words. Then came the fun part of making the flowers. You’ll have to do the course if you want to know how, but I used kitchen roll, tissue paper, very runny acrylic paint, stencils, stamps, kitchen foil and lots of gel medium. I had to adapt some of the ingredients as I didn’t have everything on Christie’s list! It was great fun, and very messy! – Thank You, Christie!
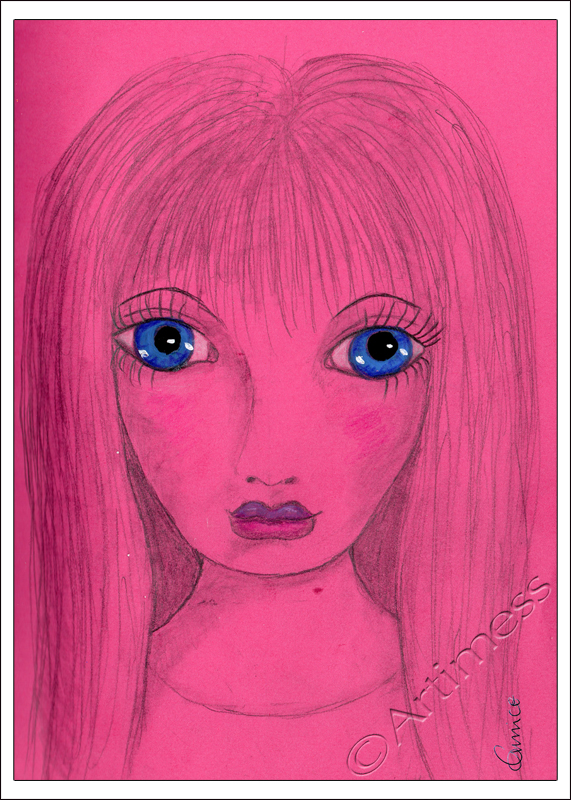
I’ve really been missing drawing this year, so today I drew the Pink Lady! I wasn’t going to colour her at all, but then I had an accident over her right eye with my white marker. So she now has blue eyes! Not a bad cover up job!
![]()