


Almost There!
We’re almost there! Today we got the keys to our new house and took the first few bits down in the car; tomorrow the removal men move all our belongings and we get to sleep in our new home for the first time!!
It’s especially exciting for us because it will be the first unfurnished house that Bry and I have had the fun of furnishing together. Today we went out and ordered our refrigerator which will be delivered on Saturday, and over the weekend we get to go shopping for beds and sofas!
I’m really looking forward to furnishing my new studio space. It’s only a tiny room ( about 7′ square) but it’s just perfect for me. I’ve already seen a perfect storage unit for my paint – this kitchen trolley from Ikea.

Effy was blogging about her one the other day and I fell totally in love – so that’s at the top of my list. I haven’t decided on anything else yet, but I’ll post progress pictures as it develops! Keep watching this space!
![]()
All Packed Up!
All Packed up and ready to go… in just over 12 hours we’ll have the keys to our new home – very exciting!

These two boxes contain essentials … my paints and brushes, recycled stamps, gel medium, stencils and many other goodies that I have been using for the last week or so. I feel as though part of me is missing at the moment! So to keep me out of mischief I’ve been playing image altering on my iPhone!

We were given this plant by a good friend just over a year ago, and it is still flowering and flourishing. I have no idea what it’s called, but I love the colour and the shape of the flowers. Can you put a name to it?
![]()
Playing With Paint!
It’s less than two days now before we get the keys to our new home and it’s getting to the point where I will have to seal up the boxes with my paint in. But I was determined to have one last play before that happens.

As you can see by the state of my hands, I had a lot of fun!

And this is the new mail art! I really wanted the colour to be all blue, but as you can see… the red and purple just couldn’t help but creep in! I used acrylic paint with stencils and fingers and home made stamps, and lots of layers – so many layers, that I don’t think any of the original envelope shows through at all!
I hope to be back with the paint by the weekend, but till then I’ll be playing with photos and blending and possibly some words!.
![]()
Front Room Blend!
![]()
I took this picture of our front room today to show my daughter how the packing was going. I was wondering how it would look if I blended some of my scanned mail art with it …

… this was the first version with just one image blended…

… and this is the second version with another image blended. I can’t decide which one I like best. What do you think?
![]()
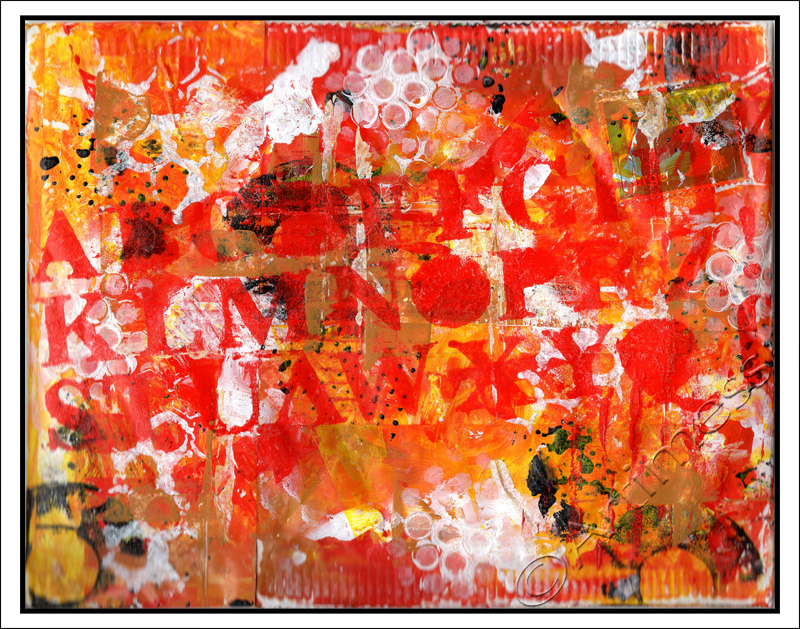
Purple Mail Art!
Four days left and counting! The packing is done except for the last few bits, all the boxes are taped up except for three of my art supply boxes, so we’re almost there!!

Carrying on the addiction, here’s another recycled padded envelope. This one originated from my pen supplier!

I started out with the ‘Fragile’ tape again – I do like how that looks through the paint! Then I added a couple of small gel medium transfers, and followed it up with lots of acrylic finger painting, recycled stamping, homemade stamping and stencilling. I finished off with a little metallic paint drippage. I think this one may have a face lurking in its depths … keep watching to find out!
![]()
More Mail Art!
Moving day is less than 5 days away. Almost everything is in boxes, but I keep delaying sealing them up so that I can keep painting! We’re moving into deep clean mode now – cleaning out cupboards, washing down paintwork and stuff like that. I ache all over from all the unaccustomed exercise!
I think I may be getting addicted to painting on recycled padded envelopes! They are so much fun, plus they’re about the only things I can find to paint on at the moment! After the move I’ll have loads of recycled cardboard – but for now I’m really enjoying my mail art.
I began by adding some “Fragile” tape to the envelope to get it started, then added lots of layers of acrylic paint with my fingers. I originally intended to use ink pads to do my stamping, but they are packed too deep for me to get to them right now, so I used some more acrylic paint on my homemade stamps. I finished off by adding a bit of drippage – very watered down acrylic paint. I’m not sure if it’s totally finished yet, but it felt like the right place to stop for now.
![]()
More Link Love!
It’s Friday again, and I’m joining with Tammy from Daisy Yellow on her link-love mission.
Today Tammy suggests we link to 5 of our favourite topics… so here goes.
Healing and Natural Living:
I love reading Rose’s blog Walk in the Woods and looking at all her beautiful photographs of the things that she makes. Rose has a home-based holistic wellness practice and creative studio, and blogs about her daily life.
Inspiration
The Tiny Buddha site run by Lori Deschene is a wonderful place to get daily inspiration and encouragement.
Hand Made Books
Robin creates the most amazing hand made books and journals – wonderful inspiration if you’re a compulsive bookmaker like me!
Journalling and Mixed Media
Rhomany’s blog is a wonderful and constant source of information and inspiration on all aspects of journalling and mixed media artwork.
Self-Care and Inner Exploration
Liz is a teacher, author and artist. I’m currently working through her book, ‘Inner Excavation’, for which she has blog posts and videos from a free read along she hosted last year here. Brilliant!
I’ve already had a sneak peek at some of the other links out there, but I’m off to have a proper look now. See you tomorrow!
![]()
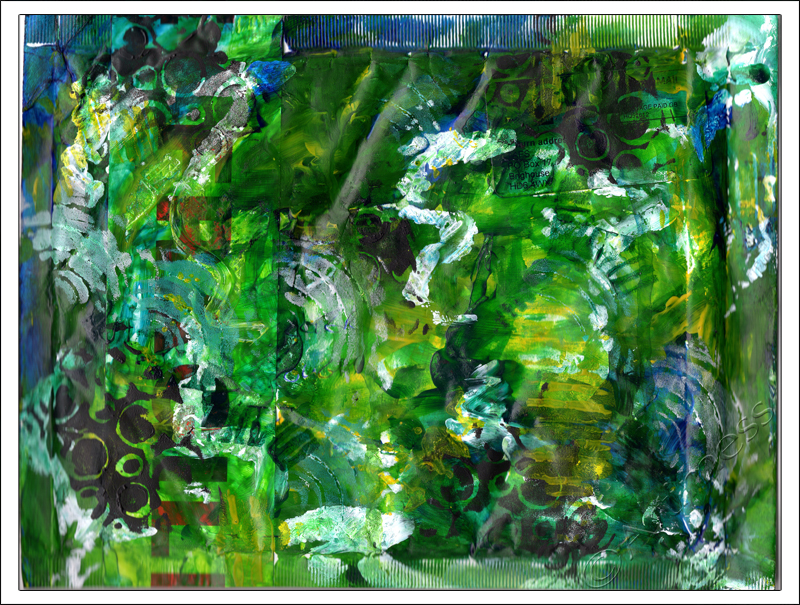
Mail Art!
I’m never quite sure what qualifies as ‘Mail Art’. Does it have to be something you make to send through the post, or can it be recycling something that has already been sent through the post? I’m sure someone will enlighten me, but in the meantime, I’m calling what I created today ‘Mail Art’!
We received it in the mail a couple of days ago when it contained some computer memory for a computer Bry is currently repairing. Knowing my acquisitive habits, he gave it to me for recycling. I originally intended to put it with my collection of padded envelopes, but it never got that far. It’s been sitting in a pile on my desk, and this evening when I was wanting to paint something small, it seemed the obvious choice of canvas.
I decorated it using acrylic paint applied with my fingers and an assortment of my recycled ‘stamps’ (sequin waste, old cards, creamer sealers, washers, etc). I finished it off using the waste from a die-cut alphabet as a stencil. I really like how it turned out – maybe I’ll re-use it as an envelope now it’s finished!
![]()
Fairytale Blending
Whenever I create anything, I take scans of my work through all its stages, so that I can use the images for backgrounds and texture in future work. Today I took two of those intemediate scans of my last two projects and played digital blending with them.
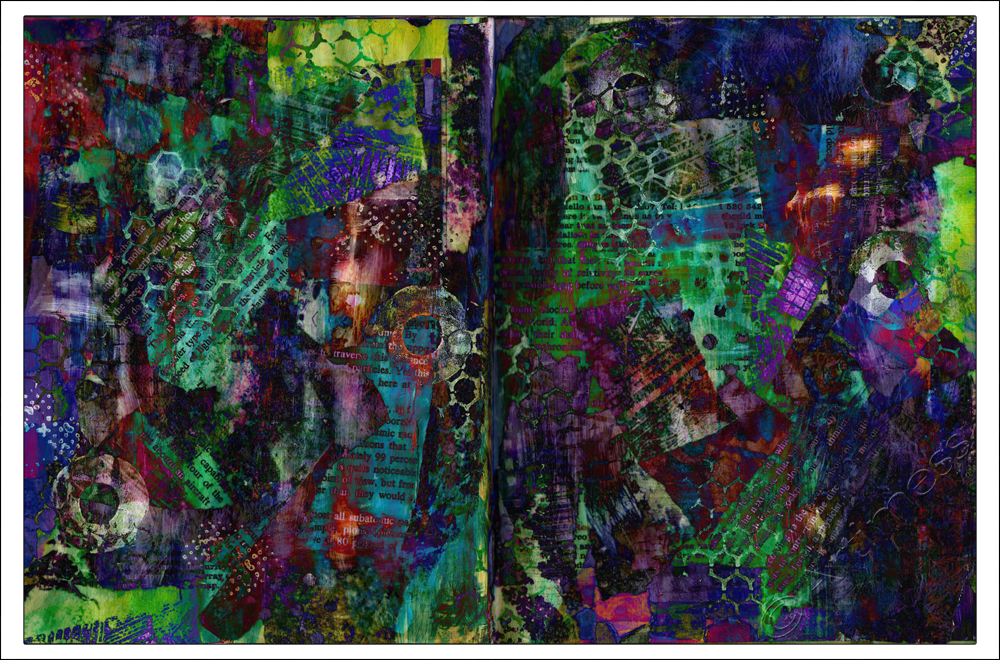
I think the result looks like the background of a fairytale story, and can imagine lots of quirky characters running around in the image. I might just print it out and have a go at adding some of them to it. What do you think?
![]()
Finally Finished!
At Last, I have finally finished last weeks Life Book 2013 lesson!
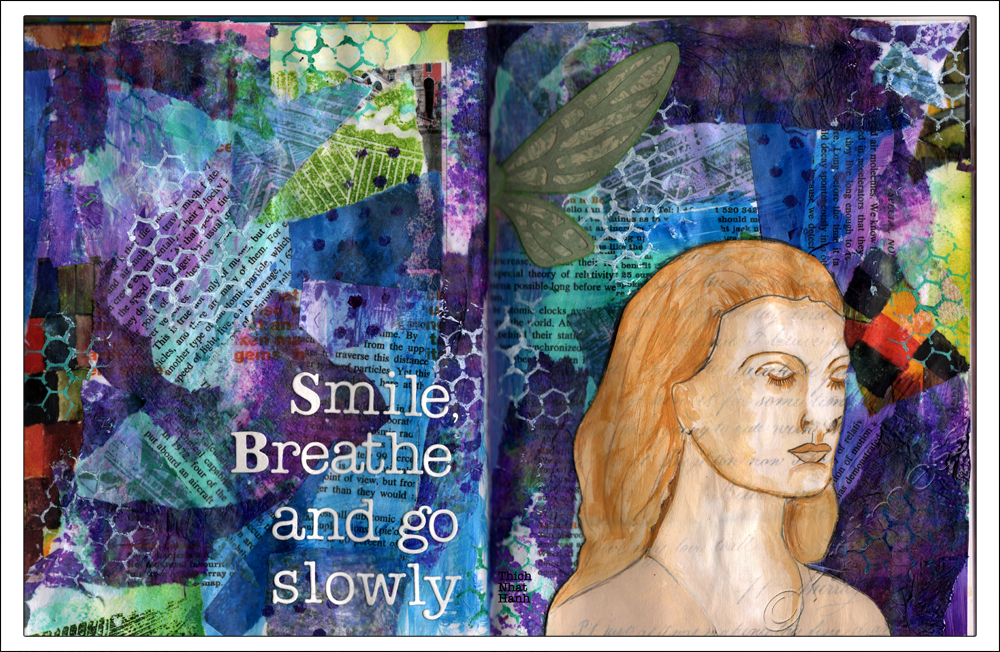
For the final touch I added the Thich Nhat Hanh quotation using die-cut letters.
Now I’m off to pack some more boxes!
![]()